

For my sister-in-law’s birthday, I wanted to create something a little extra special—not just a handmade card, but also a matching chocolate box cover to go alongside a bottle of fizz. Using soft colours, elegant embossing, and delicate butterflies, here’s how I put this co-ordinating set together.
The Card
Step 1: Base and Embossed Panel
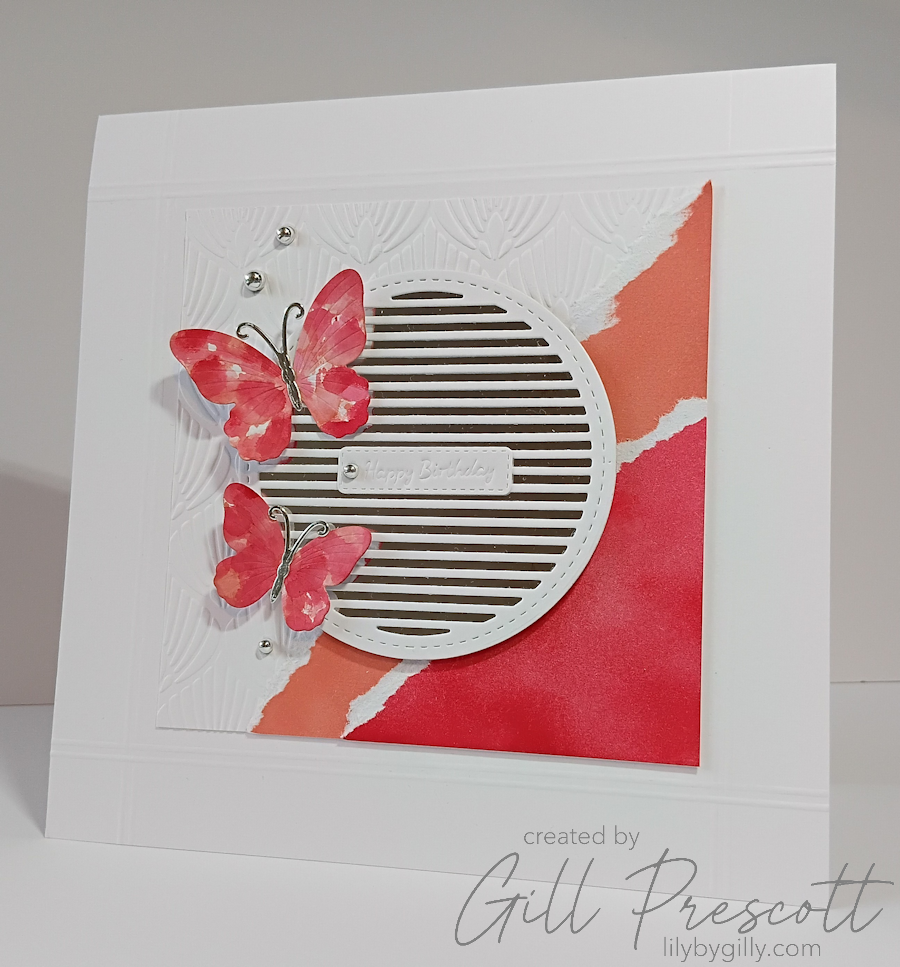
I started with an 8″ square Basic White card base. For the central panel, I embossed a square of Basic White cardstock using the Stylized Calla Lily embossing folder by Spellbinders. Once adhered to the base, I used my scoreboard to add two embossed lines around all four edges of the panel, framing the design.

Step 2: Inked Layers
To add a splash of colour, I blended ink onto two separate pieces of Basic White cardstock—one with Strawberry Slush and the other with Crisp Cantaloupe inks (both by Stampin’ Up). Each piece was torn diagonally, then layered together at the bottom right-hand corner of the embossed panel, with the Crisp Cantaloupe as the larger base and the Strawberry Slush on top.

Step 3: Central Circle Feature
From Basic White cardstock, I die cut a circle using the Slatted Circle dies by Craft Addiction UK, then cut a circle of silver mirri card to layer behind it. This was popped up with foam adhesive and placed in the centre of the card.

Step 4: Butterflies
Using the Wings of Elegance die set by Craft Addiction UK, I cut two butterflies from Basic White cardstock and their bodies from silver mirri. With the same inks as before, I dabbed the wings in a random pattern, leaving touches of white for softness. Once dry, I adhered the silver bodies and placed the butterflies to the left of the slatted circle.
Step 5: Sentiment and Finishing Touches
I die cut a stitched label tag from Basic White and embossed it with “Happy Birthday” using the Mini Tag Collection by Craft Addiction UK. This was adhered to the centre of the slatted circle. To finish, I added a sprinkling of flat-back silver pearls around the butterflies, with one pearl neatly covering the hole in the tag.
The Chocolate Box Cover
Step 1: Base Construction
I measured the box and cut/scored Basic White cardstock to wrap snugly around it. For decoration, I cut a square of silver mirri card for one side, and a slightly smaller square of Basic White (a quarter inch smaller all around).
Step 2: Central Design Panel
From the white square, I die cut the Slatted Circle and a stitched circle in the centre. This panel was adhered to the silver mirri square, then both were fixed to the right-hand side of the box cover.

Step 3: Embellishments
I adhered two butterflies (created in the same way as those on the card) around the slatted circle panel. On the left-hand side, I added two torn banners, cut from the ink-blended Crisp Cantaloupe and Strawberry Slush scraps.
To finish, I die cut two mini tags—a stitched heart in Crisp Cantaloupe and a Basic White tag embossed with three tiny hearts. These were layered on top of the banners, with a tiny ribbon bow adhered using a glue dot.

A Co-ordinated Gift
Together, the card and chocolate box cover made a beautifully co-ordinated birthday gift, and I was delighted to see how much my sister-in-law enjoyed them. Paired with a bottle of fizz, it felt like the perfect way to celebrate her special day!
Adapting the Design
This design could be used for a variety of occasions, from birthdays to thank yous and everything in between. I hope you’re inspired to use your inks and dies to create something beautiful today.

