
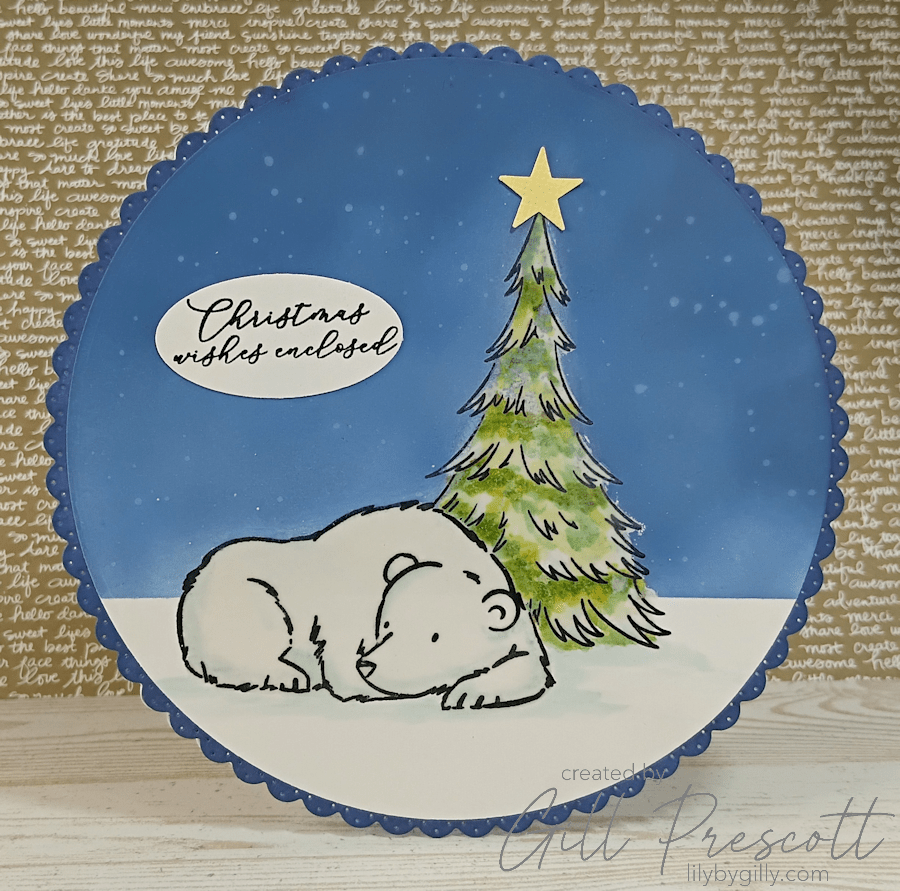
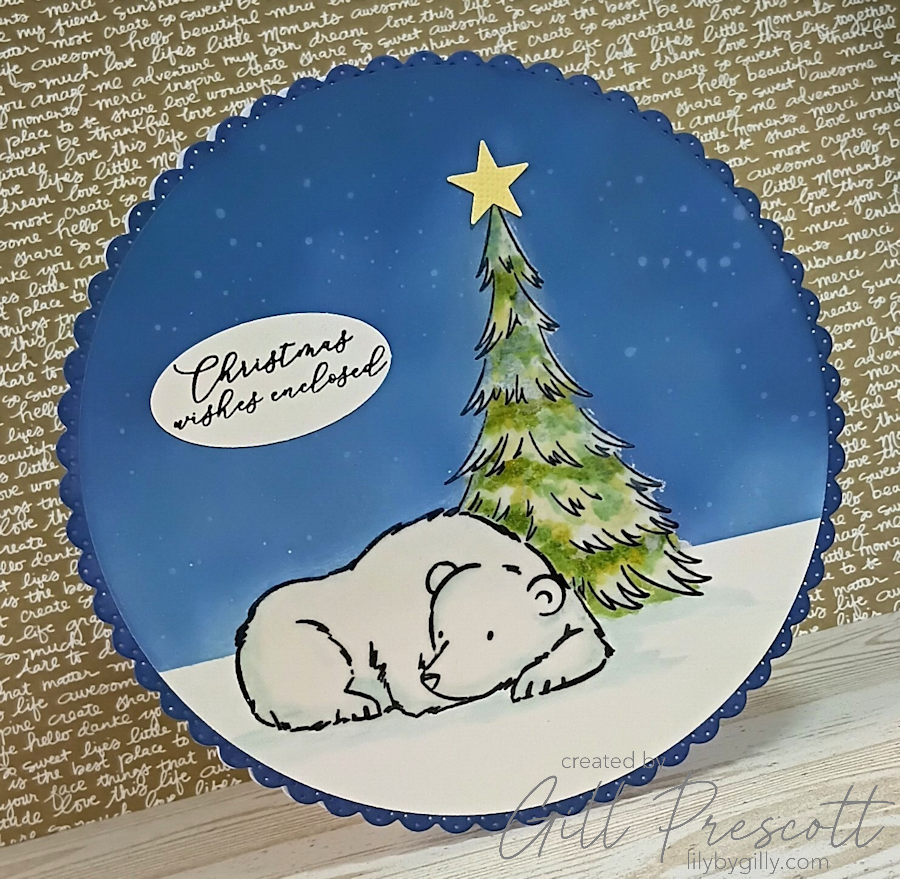
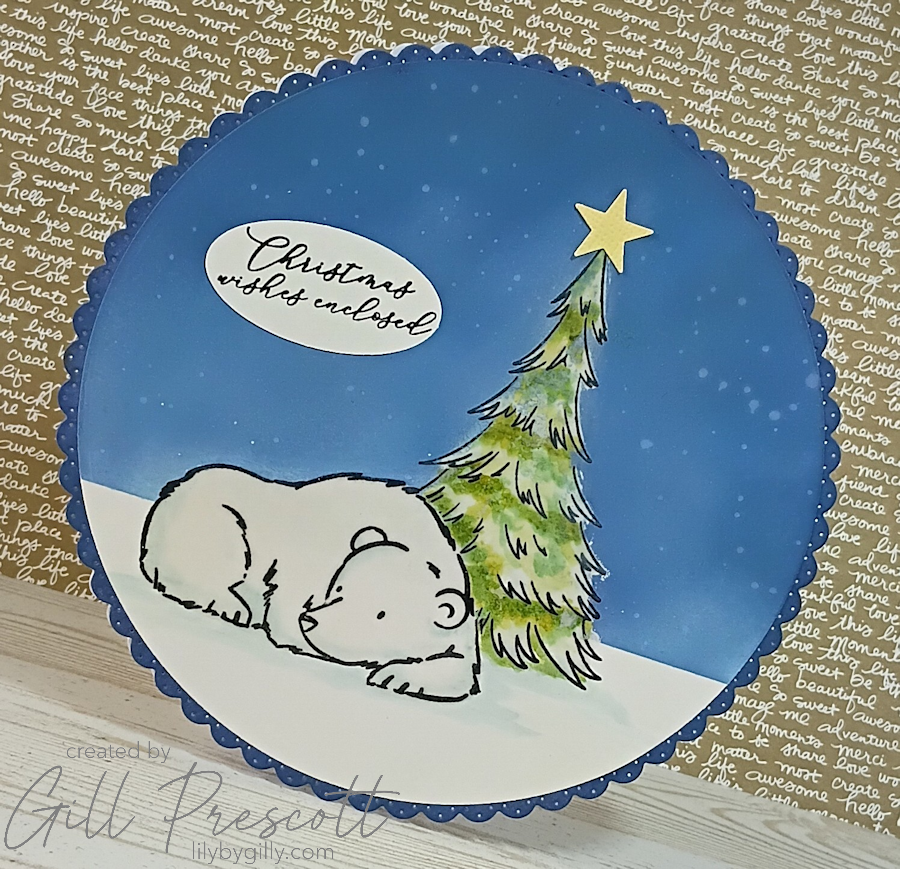
This week’s technique challenge at 52 Christmas Card Throwdown is all about one of my favourite messy-but-magical techniques: heat emboss resist. I couldn’t resist turning it into a wintery circular Christmas card, with a soft storybook feel and a dramatic night sky.
The stars of the show are the adorable polar bear from Storybook Animals and the Christmas tree from the Custom Christmas stamp set by Josh Griffiths for Beyond Stamping. Add in lots of masking, embossing, and ink blending, and this card really comes to life.
How the Card Came Together
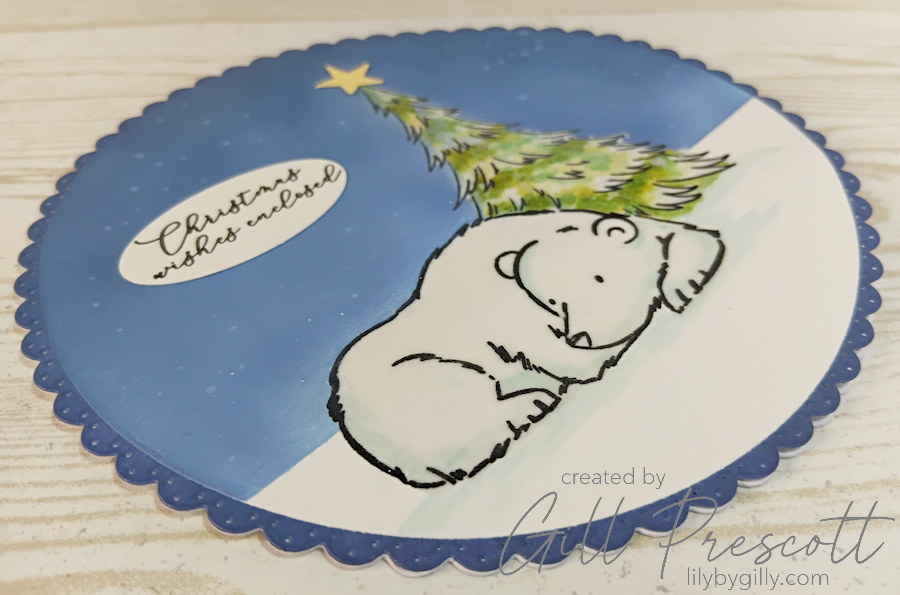
I began by die cutting a large circle from Whisper White card using the 2nd largest die from the Fresh Cut Deluxe Circle Dies by Clarity Crafts. This forms both the focal panel and the card front.
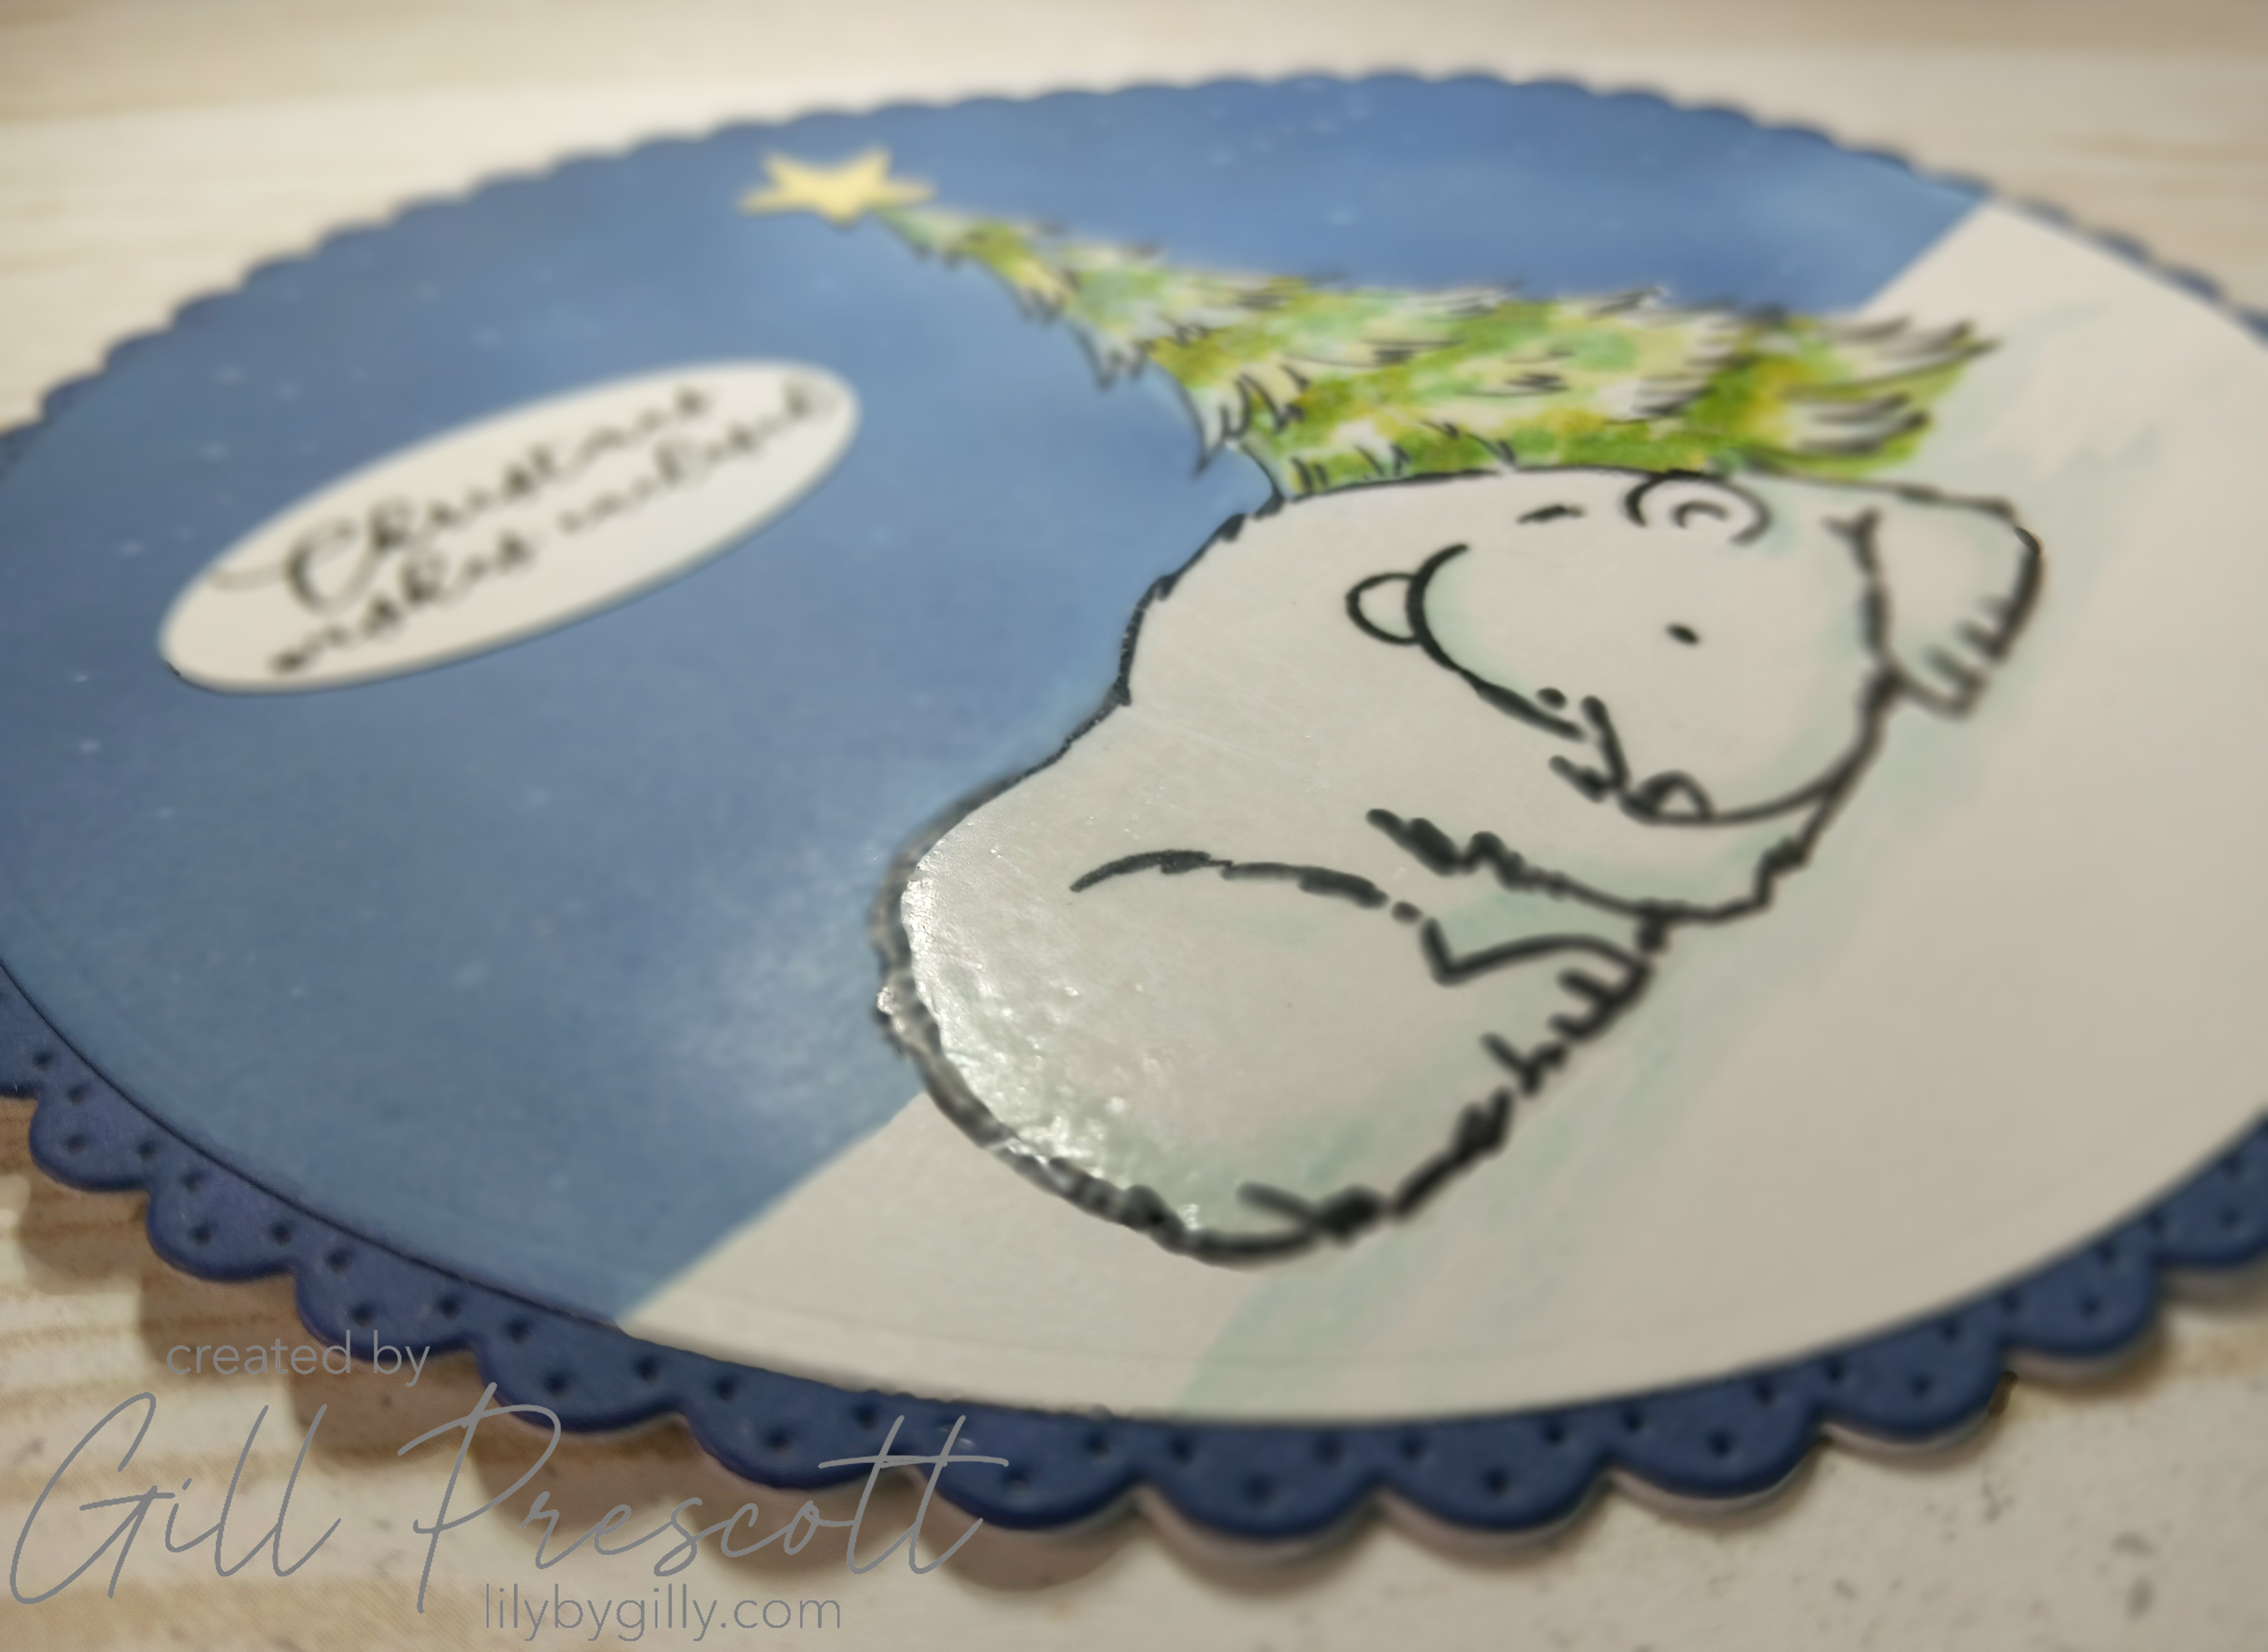
I love the stamps by Josh Griffiths – he’s an amazing local artist and his stamp range is fabulous. First, I stamped the polar bear onto the bottom half of the circle using black ink. I immediately added clear embossing powder and heat set it. Once cool, I carefully masked the bear using masking paper from Clarity Crafts.
Next, I stamped the Christmas tree over the masked area so it appeared behind the bear. After removing the mask, I added more clear embossing powder over the tree and heat set again.
To colour the tree, I used an Aqua Painter with Old Olive and Garden Green inks, applying colour in a loose, random pattern and deliberately leaving some white areas for a snowy look. I added gentle shading to the bear using Soft Sky ink, then left the piece to dry (you can speed this up carefully with a heat tool).
Heat Emboss Resist Magic
Once dry, I used a VersaMarker pen to go over both the bear and the tree, making them sticky again. Another layer of clear embossing powder was added and heat set – this is what allows the resist effect to shine later.
I then masked a horizon line with more masking paper and blended Distress Oxide inks over the entire background using blending brushes:
- Tumbled Glass
- Faded Jeans
- Chipped Sapphire
After removing the mask, I gently buffed ink off the embossed images – the resist effect reveals the lighter images beautifully against the dark sky.
For the final background detail, I used a fan brush to splatter water over the sky. After a few moments, I lifted the colour with a tissue, creating a soft, starry night effect. In hindsight, I could have taken the emboss resist technique further and heat emboss random dots over the sky area before inking, which would have showcased this technique even more – pity I didn’t think of it at the time!
Finishing the Card
The sentiment comes from Envelope of Wonder Sentiments by Spellbinders, stamped in black ink on white card and punched out with an oval punch.
To create a base card and frame the design, I die cut two white Scallopstack Circles by Craft Addiction UK. I blended Chipped Sapphire ink around the edge of one circle and adhered the stamped panel to its centre.
The second scallop circle was scored about 3/4″ in to create a hinge, forming the base of the circular card. I then adhered the inked focal piece to the front.
As a final festive touch, I punched a small yellow star and added it to the top of the tree – a simple detail that really finishes the scene.

Why I Love This Technique
Heat emboss resist is ideal for a technique challenge, as it makes the most of everyday supplies we already have in our craft stash – stamps, inks, embossing powder and masks. The contrast between the crisp embossed images and the inky night sky gives so much depth, and it works beautifully for winter scenes.
If you fancy getting a bit inky and experimental, I highly recommend giving this technique a go – it’s messy, fun, and incredibly satisfying.
Thanks for stopping by, and don’t forget to check out all the inspiring entries over at 52 Christmas Card Throwdown and do join us – we’d love to see what you make.


Absolutely adore this polar bear, how you’ve achieved so much character with so little detail is amazing… And he’s cute,. The simplicity and subtle textures complete a wonders scene♥️♥️♥️
oh la la que c’est adorable Gill, j’aime beaucoup cette scène si mignonne, biz
Oh I love this Gill – such a great idea to use the resist technique on the bear!