
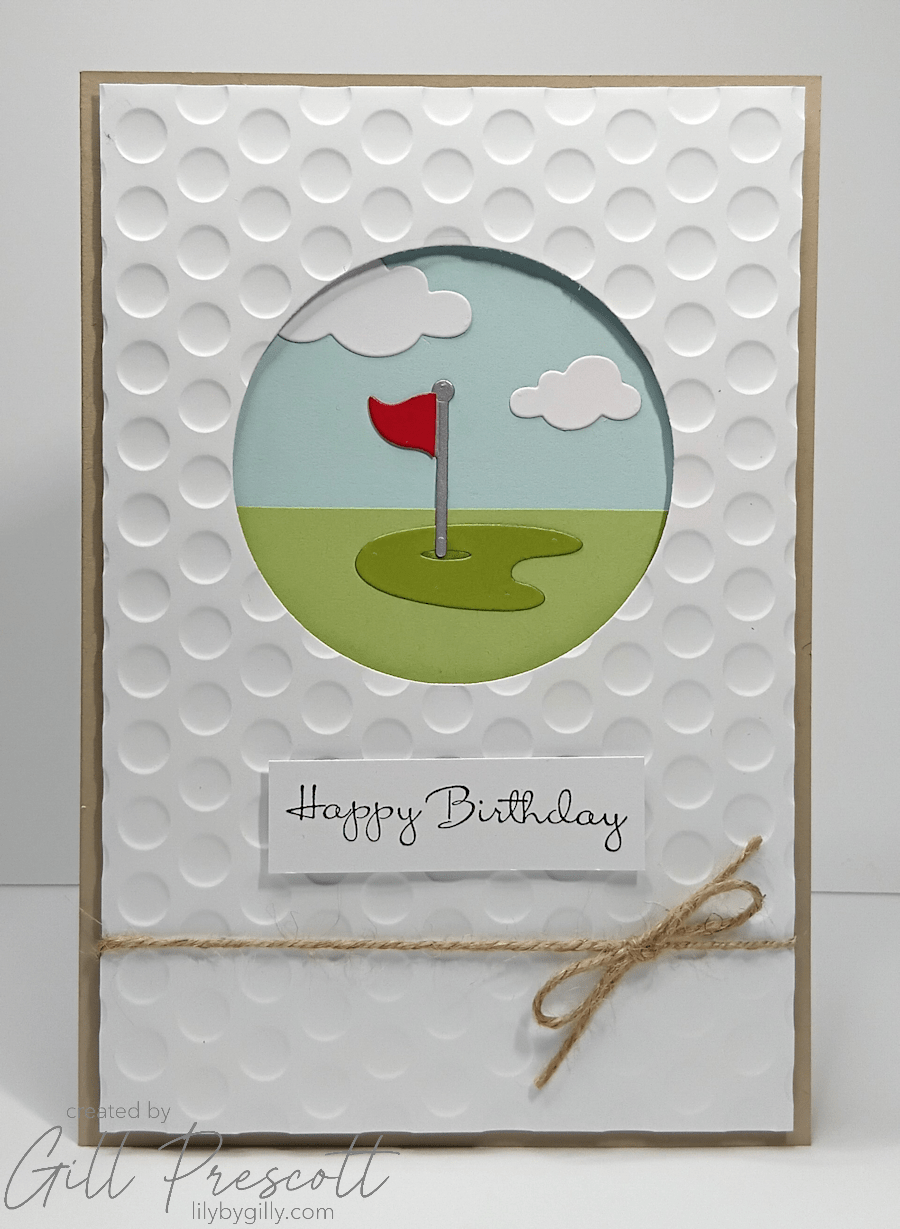
Sometimes the best inspiration comes from a little scroll through Pinterest, and that’s exactly how this card began. I spotted a few lovely golf-themed designs with soft neutral colours and rustic textures, and one in particular that had a vignette style and decided to create my own version for a birthday card. The result is a clean, masculine design with just enough detail to make it special — perfect for the golfer in your life.
Here’s how I put it together.
What You’ll Need
- Cardstock: Crumb Cake, white, silver, red, 2 shades of green and blue
- Embossing Folder: Spellbinders 3D Puffy Dot
- Dies: Golf-themed dies (green and flag), Sizzix Hot Air Balloon (for clouds)
- Twine: Natural jute twine
- Sentiment Stamp: Happy Birthday greeting by Stampin Up
- Ink: Black ink
- Adhesives: Foam adhesive and liquid glue
Step 1: Prepare the Card Base
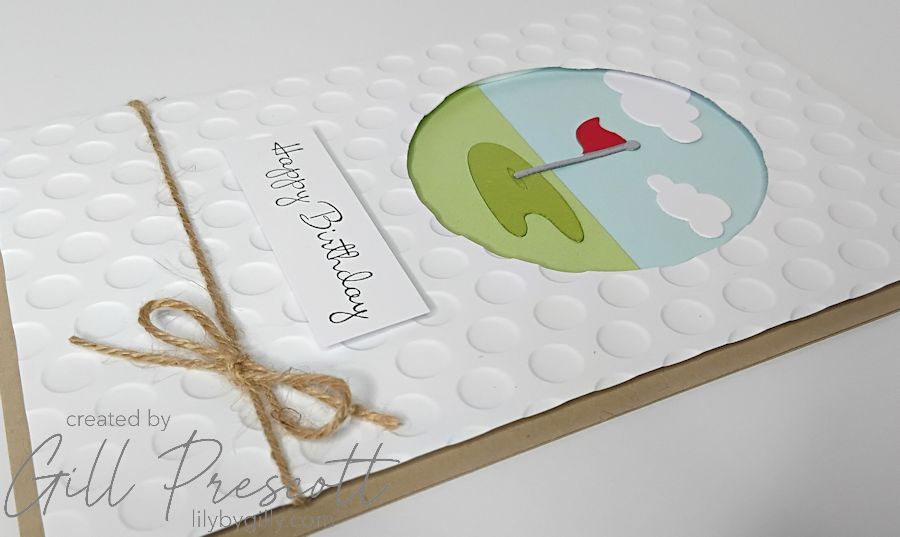
Start with an A4 Crumb Cake piece of card, score and fold in half to create an A5 card base. I love this warm neutral colour for masculine cards — it gives a slightly rustic feel and works beautifully with natural textures like twine.
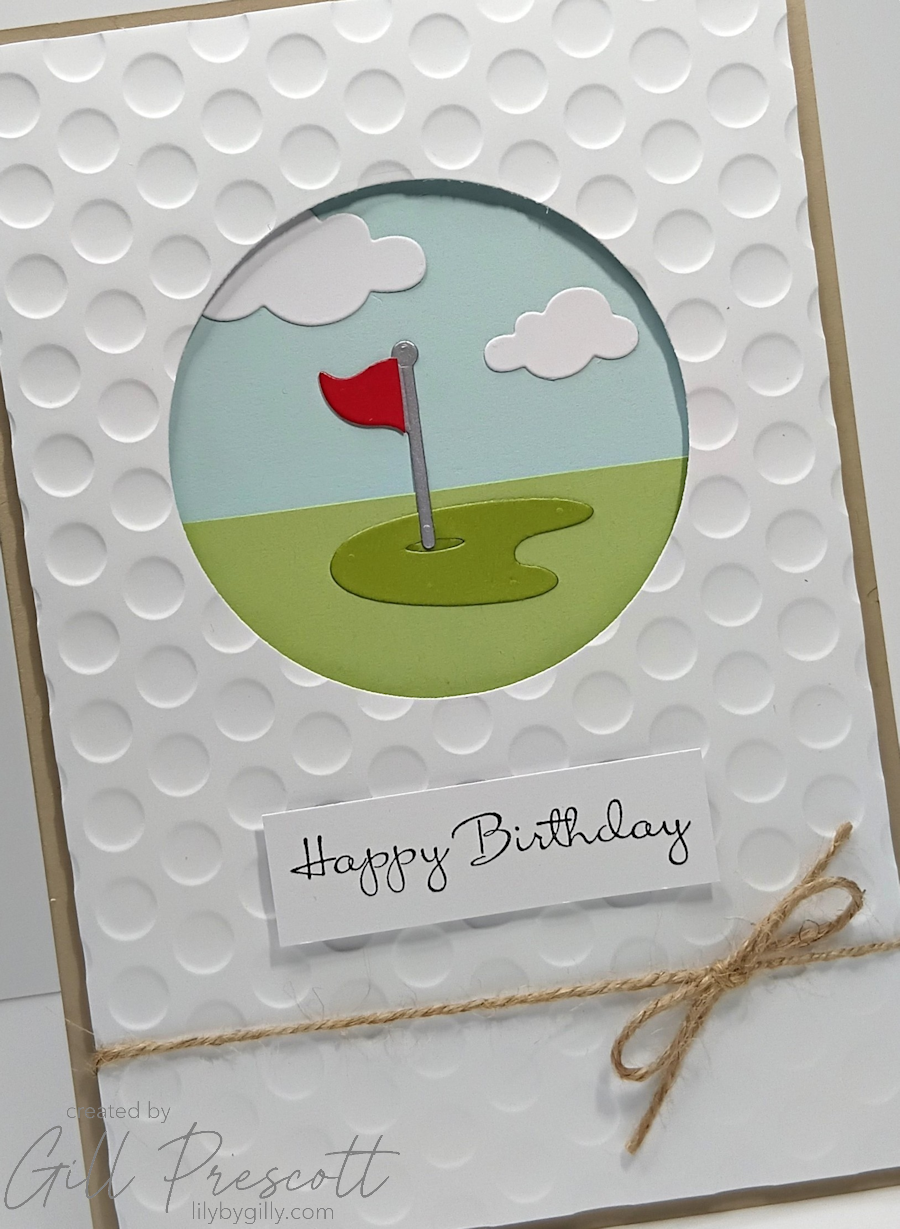
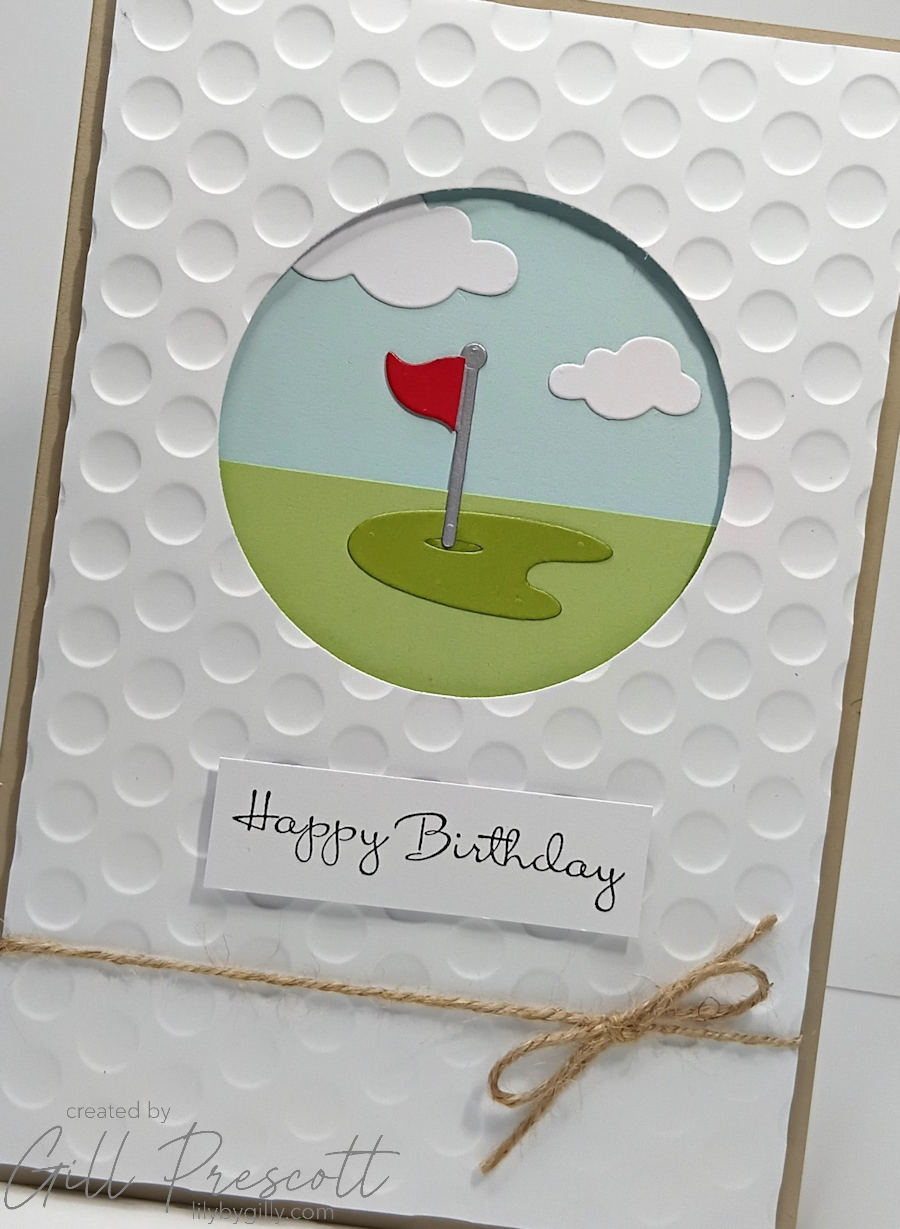
Cut a white panel slightly smaller than the card front to allow a small border all round. Before embossing, die cut a circle aperture in the panel, positioned slightly higher than the centre. This opening will frame the little golf scene later on.
Step 2: Add Texture with Embossing
Run the white panel through your die-cutting machine using the Spellbinders 3D Puffy Dot embossing folder. This creates a soft textured background that adds interest without overpowering the design. I chose to use the debossed side of the panel, as the indented dots reminded me of the dimples on a golf ball, which felt like a perfect little detail for a golf-themed card.
Once embossed, wrap a length of jute twine horizontally across the panel near the bottom and tie it in a small knot or bow. It’s a simple detail but adds a lovely bit of rustic texture.
Step 3: Create the Golf Scene
Now for the fun part — building the scene that will appear through the circular window.
Cut two strips of cardstock, slightly wider than the aperture. One will represent the grass and the other the sky. Glue them horizontally onto the Crumb Cake base card, positioning them so they’ll sit nicely behind the aperture when the panel is added.
Using your golf dies, die cut a golf green and the flag pin. I used brushed silver cardstock for the pole and red for the flag, which gives a nice pop of colour against the softer background.
Adhere the green and flag to the centre of the scene. To finish it off, add one or two small clouds, die cut using the Sizzix Hot Air Balloon die set, floating gently in the sky.
Step 4: Assemble the Card
Once the scene is complete, adhere the embossed white panel over the top using foam adhesive. This gives the card some lovely dimension and really highlights the little golf course vignette through the aperture.
Step 5: Add the Sentiment
Stamp a Happy Birthday greeting onto white cardstock using black ink. Trim it into your preferred shape — I went with a simple rectangle for a clean look — and adhere it below the focal scene.
Final Thoughts
I really like how this card turned out. The crumb cake base and twine give it a relaxed, masculine feel, while the embossed panel and layered scene add just enough detail to keep it interesting. It’s also a great reminder that a simple aperture can completely transform a design.
If you’ve got a golfer in your life, this is a fun and fairly quick card to recreate — and it’s easy to customise with different colours or sentiments.
Happy crafting!


Cool, did you intentionally make it look like the surface of a golf ball?
That’s fab! I love the dotted embossed front that looks like golf balls