

This week’s challenge over at 52 Christmas Card Throwdown is a really fun one — create a card using only white and blue. Monochrome challenges can sometimes feel a little tricky, so I decided to lean into it and add interest through dimension and movement rather than extra colours.
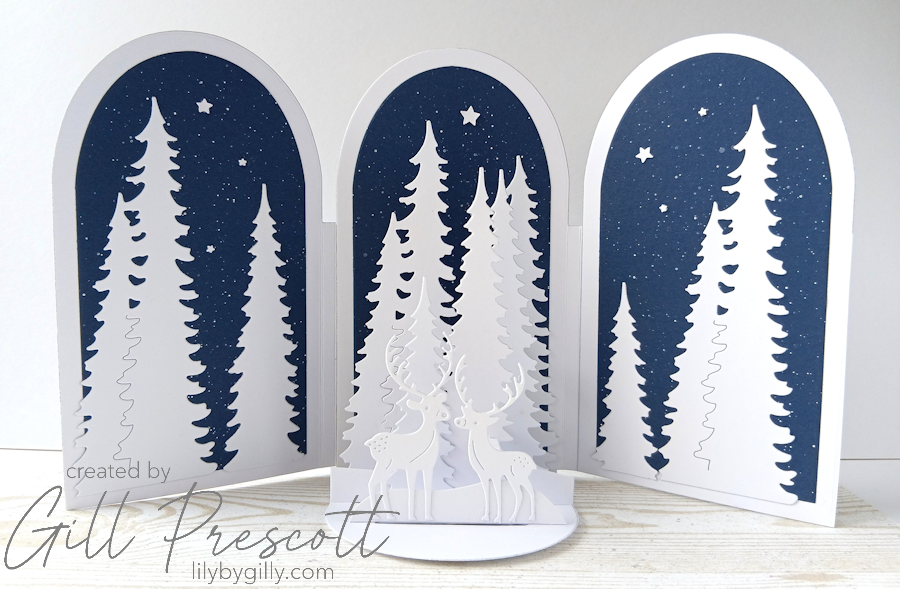
The solution? A tri-fold pop-up card, inspired by the gorgeous designs made with the Scrappy Tails dies. Using white and Night of Navy cardstock, I created a little winter woodland scene that really comes to life when the card is opened.
Here’s how it all came together.
What You’ll Need
- Cardstock: White and Night of Navy
- Dies: Trees, reindeer and sentiment dies (Scrappy Tails pop-up scene dies)
- Embellishments: Tiny punched stars
- Pen: White Posca paint pen
- Adhesives: liquid glue
Step 1: Create the Card Base
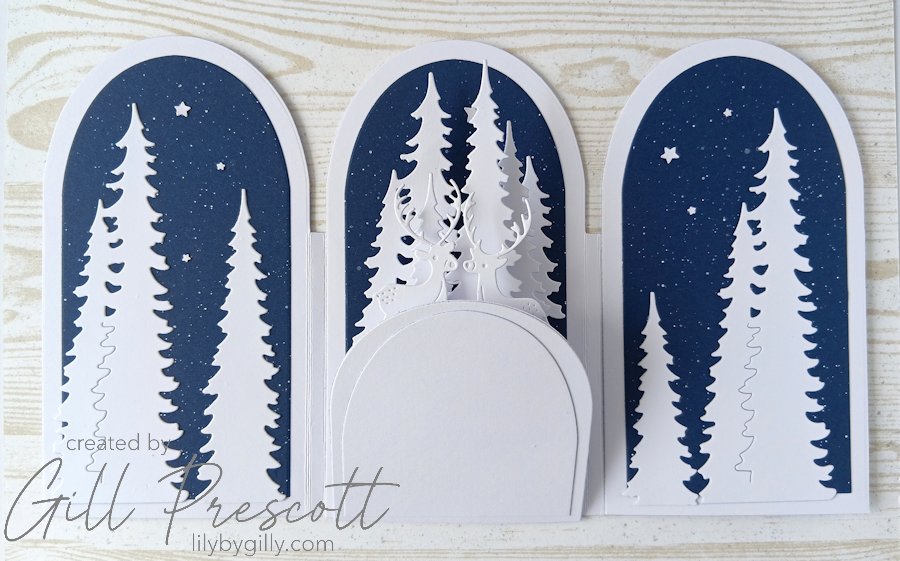
Start by cutting all the base pieces from white cardstock to form the tri-fold pop-up structure. This style of card creates several panels and bridges inside the card that pop forward when it’s opened.
For the decorative layers, cut five panels from Night of Navy cardstock — one for the front, one for the right side, and three for the inside panels.
Step 2: Create a Starry Sky
Before assembling the card, decorate the navy panels to create a night sky effect. Using a white Posca pen, lightly splash tiny dots across the cardstock to mimic stars. This simple step makes such a difference and adds lovely texture to the background.
Once the paint is dry, adhere the navy panels to the white base pieces.
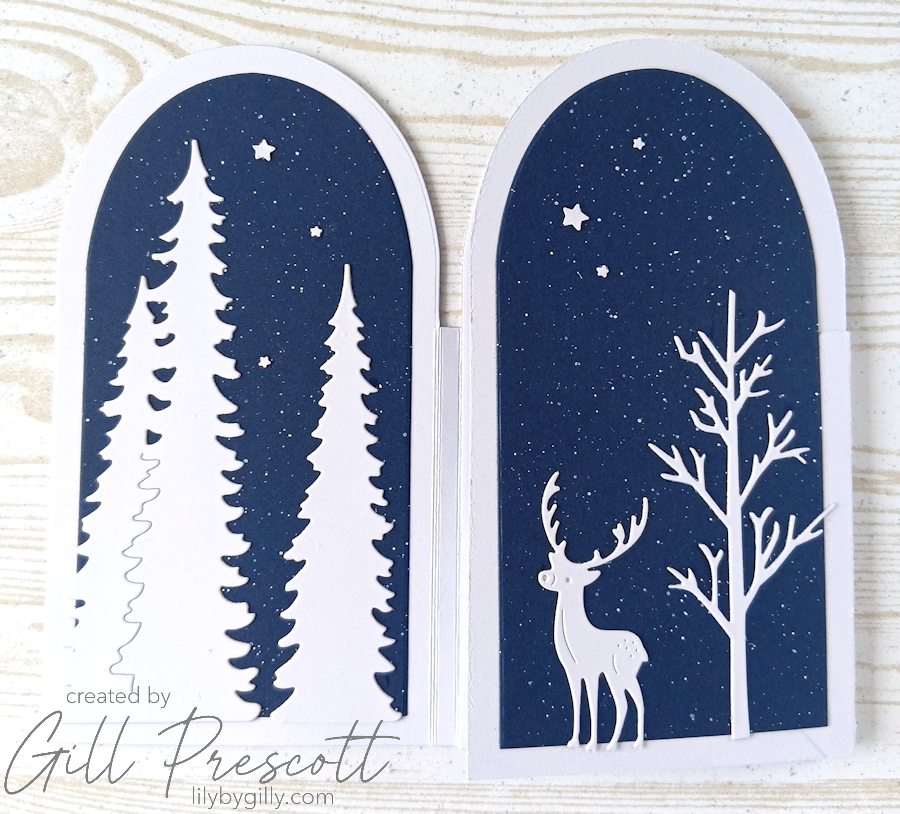
Step 3: Build the Winter Scene
Next, die cut a variety of trees from white cardstock and arrange them across the navy panels. Placing them at different heights helps create depth and makes the little woodland scene feel more natural.
From the same die set, cut several reindeer silhouettes and position them amongst the trees. I especially enjoyed layering the centre drop-down panel with trees of different heights, which gives the scene a lovely sense of depth when the card opens.
Step 4: Add Snowy Bridges
To enhance the pop-up effect, I added strips of white cardstock to the two front bridges, trimming them by hand into gentle curves to look like snowdrifts.
Then I adhered two of the reindeer onto the front bridge, facing each other — almost nose to nose. It’s such a sweet little detail and instantly became one of my favourite parts of the card.
Step 5: Finish the Night Sky
To add a little more sparkle and interest to the sky, I adhered a sprinkling of tiny punched stars across sections of the navy background. Keeping them fairly random helps the scene feel more natural, like a real winter sky.
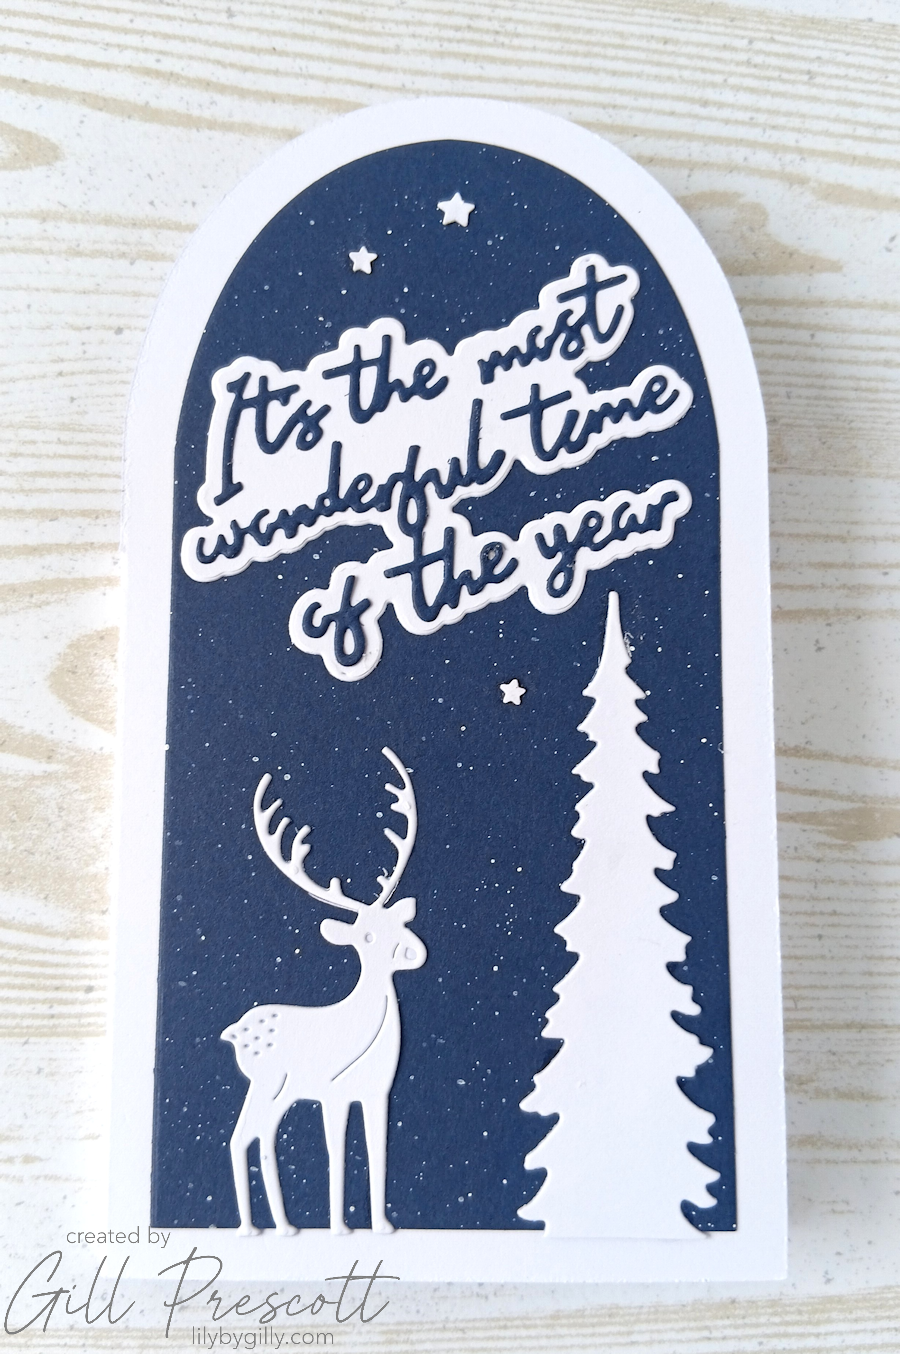
Step 6: Decorate the Front
For the front panel, I kept things simple so the surprise remains inside. A die-cut sentiment takes centre stage, accompanied by a single tree, a reindeer, and a few scattered stars.
It gives just a little hint of the winter scene waiting inside.
Final Thoughts
I absolutely love how this card turned out. Working with just white and blue really highlights the crisp wintery feel, and the pop-up scene inside adds all the drama when the card is opened. It’s definitely one of those cards that’s destined for the mantelpiece rather than the recycling bin!
If you’re looking for something a little different this week, why not give a dimensional card a go and join in with the 52 Christmas Card Throwdown colour challenge? Monochrome doesn’t have to mean simple — sometimes it’s the perfect excuse to get creative with texture, layers and movement.
Happy crafting!


Oh wow – that’s amazing, Gill! What a fantastic design – so much impact with just the navy and white card!
wow, who’d have thought blue and white could be so stunning, the inside is like Sagrada Familia in pine♥️
wow Gill, elle est tellement splendide, j’aime ces modèles si travaillés, j’adore, biz
Wow Gill, she’s so gorgeous! I love these intricate designs, I adore them, kisses!
Ich bin wirklich begeistert von der tollen Umsetzung der Challenge und bedanke mich für deinen netten Kommentar! 11i