

Hello crafty friends! I’m a little late again with my festive make as part of the design team for 52 Christmas Card Throwdown, with this week’s technique theme being one of my absolute favourites — embossing! Whether it’s heat embossing or dry embossing, there’s something so magical about adding that extra texture and shimmer to your cards.
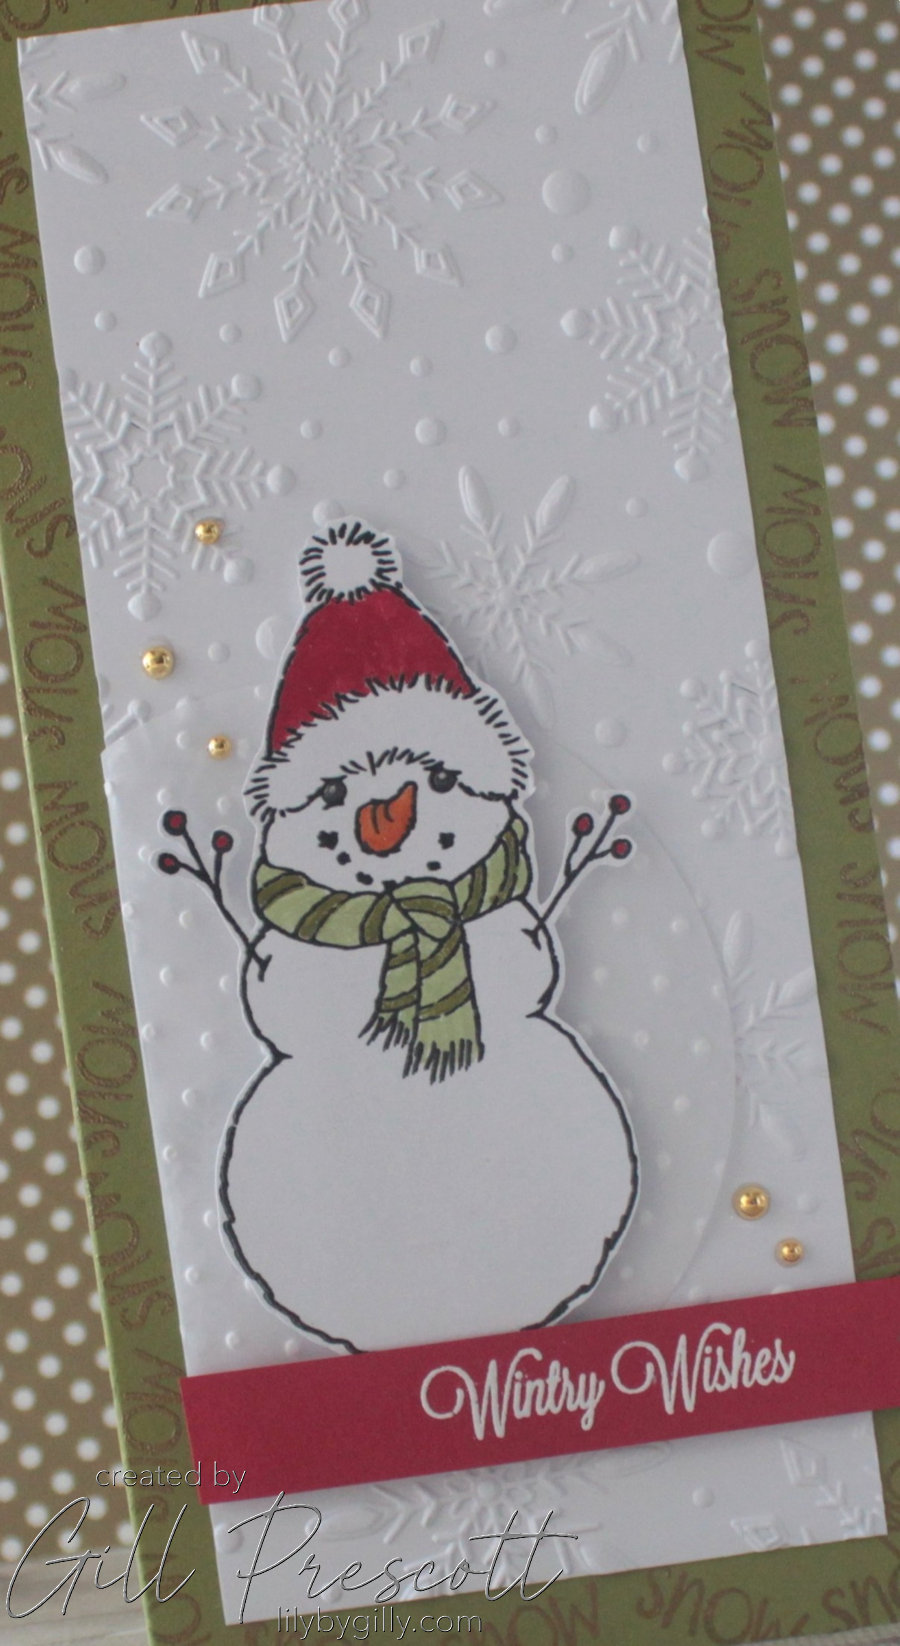
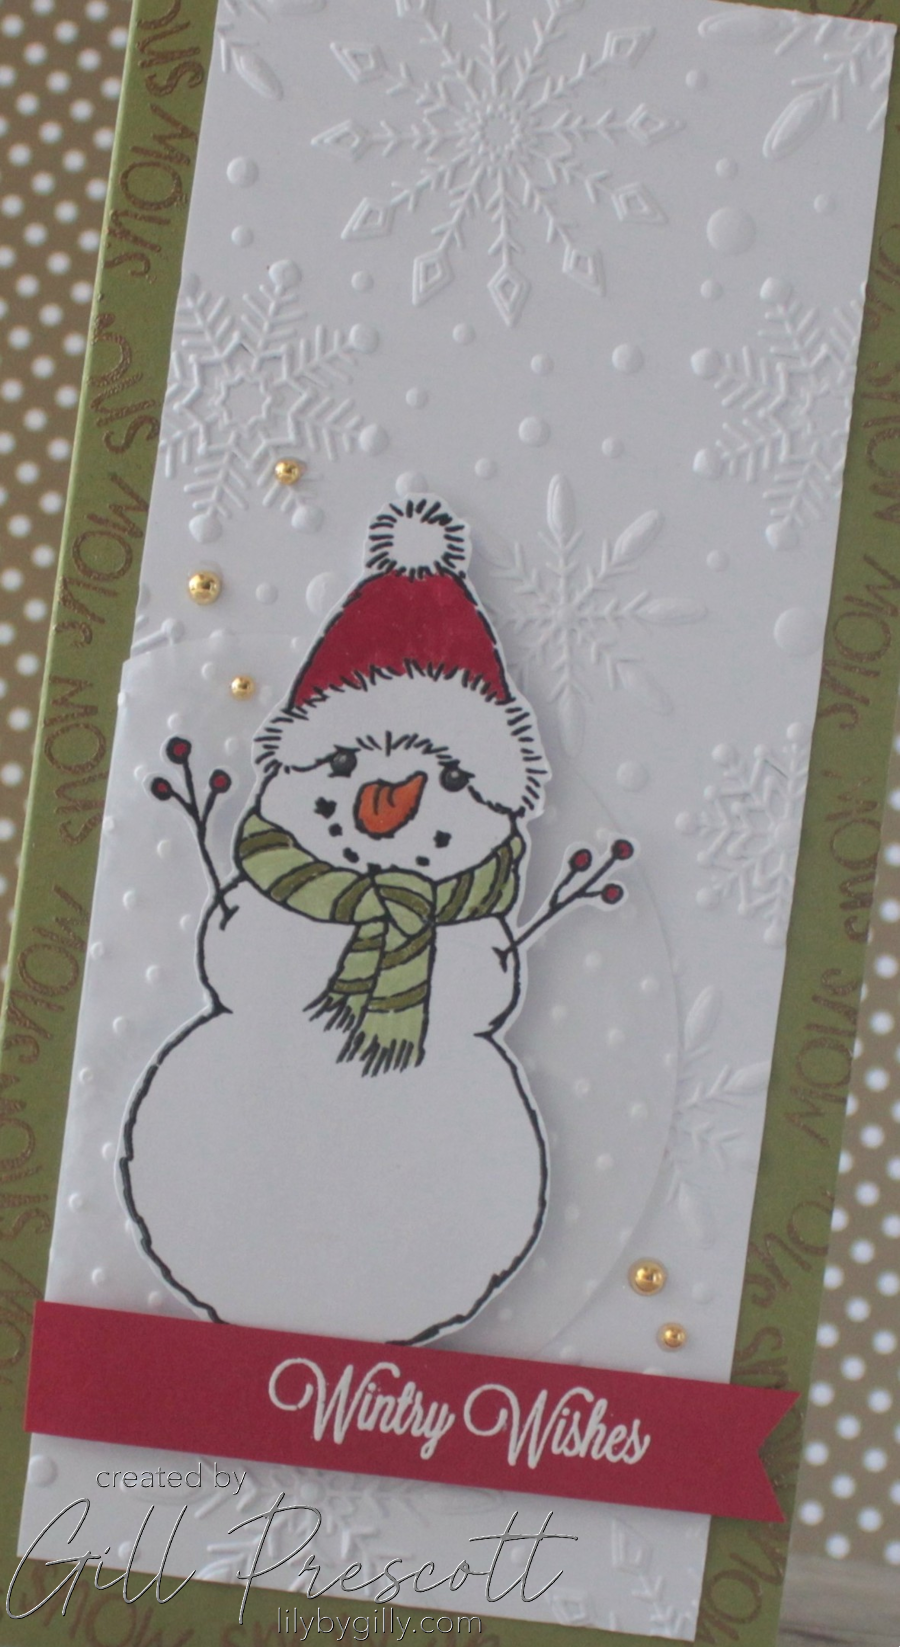
Today, I’m sharing a DL-sized Christmas card packed with embossed elements and featuring a charming snowman scene — all built with a cozy palette of Old Olive, Real Red, Basic White, and Vellum.
Materials Used:
- DL size card base in Old Olive cardstock
- Basic White cardstock (for stamping and center panel)
- Real Red, Old Olive, Pumpkin Pie, Certainly Celery Stampin’ Write Markers
- Vellum
- Flurry of Snowflakes 3D Embossing Folder by Spellbinders
- Polka Dots Embossing Folder by Stampin’ Up
- Snowy Friends Stamp Set by Stampendous
- The Winter Garden Sentiments by Spellbinders
- VersaFine Clair black pigment ink
- Versamark ink
- Clear, gold and white embossing powders
- Gold half-back pearls
- Heat tool, adhesive, trimmer, dimensional foam adhesive, big shot die cutting machine
Step-by-Step Instructions:
Step 1: Emboss the Background Base
To start, stamp the word “snow” from the Snowy Friends stamp set around the border of the Old Olive DL-sized card base using Versamark ink, then heat emboss the words with gold embossing powder. This creates a beautiful festive frame that immediately catches the light.
Step 2: Emboss the Center Panel
Trim a piece of Basic White cardstock to leave a half-inch gap around all sides when placed on the card base. Run this panel through a die-cut machine using the Flurry of Snowflakes 3D embossing folder by Spellbinders. The result? A stunning snowy texture that adds elegant dimension.
Step 3: Add a Vellum Circle
Die-cut a circle of vellum and emboss with the Polka Dots embossing folder by Stampin’ Up. Fold one of the vellum edges behind the white panel and secure it with adhesive hidden where it will be covered by the focal image — a great trick to keep vellum neat and clean without visible glue marks!

Step 4: Stamped and Embossed Snowman
Next, stamp the large snowman from the Snowy Friends set on Basic White cardstock using VersaFine Clair black pigment ink, then heat emboss with clear embossing powder for a glossy, crisp outline.
Bring him to life with Real Red and Old Olive markers for his hat, scarf, and berries, Pumpkin Pie for his carrot nose, and a touch of Certainly Celery for soft green accents. After fussy cutting him out, he will be ready to take center stage!
Step 5: Assemble the Card
Adhere the white embossed panel onto the green base with strong adhesive. Then pop up the snowman on top of the vellum circle using dimensional adhesive.
For the sentiment, stamp “Wintry Wishes” from The Winter Garden Sentiments by Spellbinders in Versamark ink onto real red card, heat emboss it in white, and cut it into a banner with a flagged end to one side. Attach it below the snowman with more foam tape making sure the snowman is tucked behind so he is not “floating”.

Step 6: Finishing Touches
To finish, add shine to the snowman’s nose and eyes, such as crystal effects or even express glue by Sizzix which dries to a nice shine. Finally, add a sprinkling of gold half-back pearls around the panel for a subtle sparkle that ties in with the gold embossing on the base.
Final Thoughts
This card is a joyful celebration of texture, shimmer, and seasonal charm, perfect for this week’s embossing challenge! Whether you’re team heat embossing or dry embossing (or both like me!), there’s no denying the magic these techniques add to our festive creations. I love the shine to the snowman’s outline and his eyes and nose too.
I can’t wait to see your embossed beauties this week over at 52 Christmas Card Throwdown and there is still plenty of time to submit your cards to the challenge! Happy embossing and happy holidays!
