

This week’s sketch over at 52 Christmas Card Throwdown really jumped out at me. It felt like the perfect excuse to go bold with a single focal image while still having fun with texture and a few well-placed embellishments. I’ve been longing to use this nutcracker die set since I was lucky enough to purchase him in the Spellbinders’ sale last year! Today I’m sharing how I put this card together, combining texture, sparkle and a little bit of dimension for a clean but Christmassy design.
What You’ll Need:
- Cardstock: White, Soft Sky, Black, Pale Peach, Gold Mirror, Red Glitter
- Dies: Spellbinders Dancin’ Nutcracker Fritz
- Embossing Folder: Spellbinders Flurry of Snowflakes 3D embossing folder
- Stamps: Stampin’ Up sentiment
- Ink: Black ink
- Adhesives: Foam adhesive and liquid glue
Step 1: Card Base and Background Panel
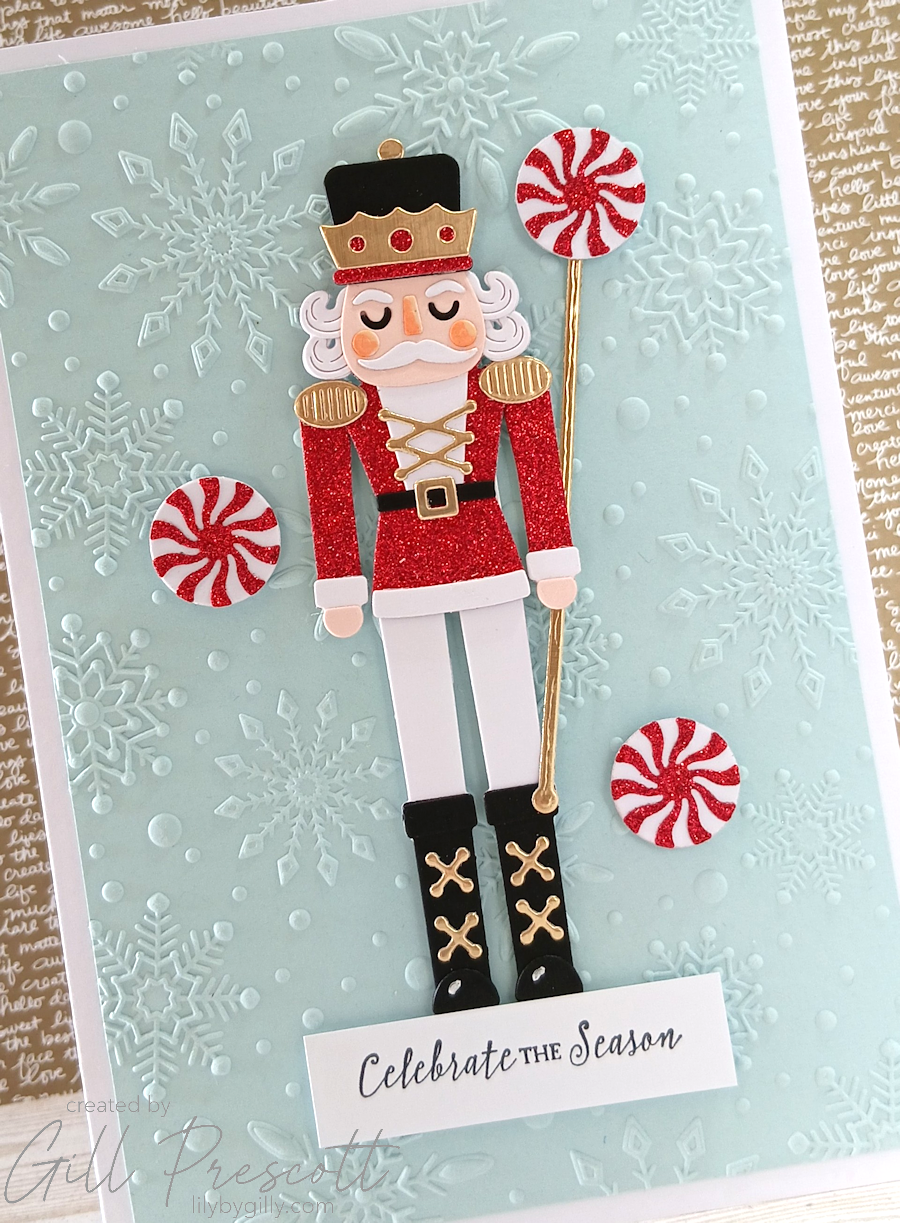
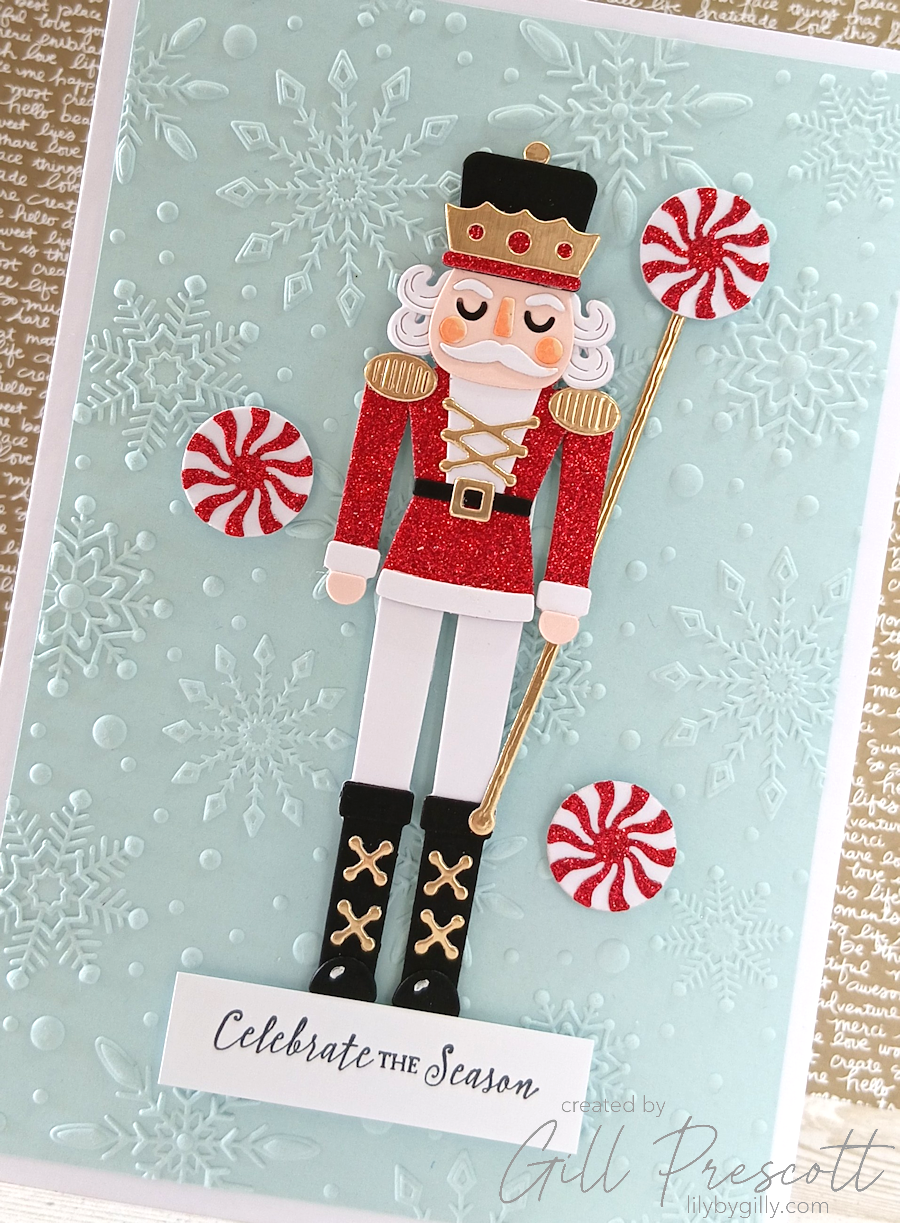
Start with a white cardstock card base, folded to your preferred size – mine is A5. For the centre panel, cut a piece of soft sky cardstock and run it through your die-cutting machine using the Flurry of Snowflakes 3D embossing folder. I love how this embossing folder adds instant wintery texture without needing any extra ink or embellishment, and love the contrast of red against the blue background – they go perfectly together. Trim the panel to ¼ inch smaller all round and adhere this panel to the centre of the card, lining it up with the sketch.
Step 2: Die Cut and Assemble the Nutcracker
Next comes the fun part! Using the Dancin’ Nutcracker Fritz die set, die cut all the pieces from black, white, pale peach, gold mirri and red glitter cardstock. Take your time assembling him – there are lots of lovely little details, and the mix of glitter and smooth cardstock really helps them stand out.
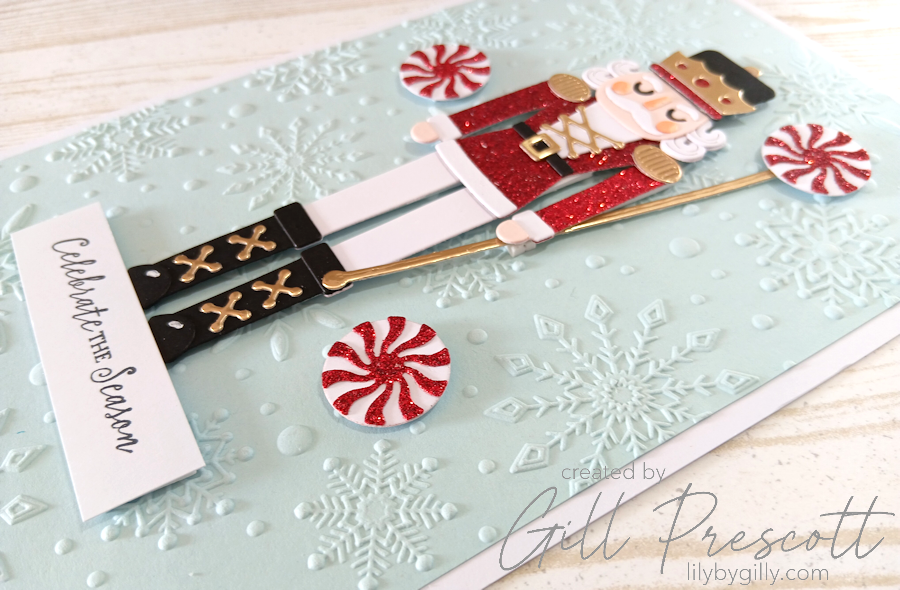
Once he’s assembled, adhere the nutcracker to the centre of the card using foam adhesive to give him some lift and make him the star of the show. The legs of the nutcracker can also be attached to the card using a circle of foam adhesive, leaving his legs free to swing and move back and forth – such fun!
Step 3: Add the Sentiment
Stamp your chosen sentiment in black ink onto white cardstock and trim it into a simple rectangle. The sketch on the die set has the nutcracker standing on a drum, but to fit with the sketch, I adhered the sentment strip underneath the nutcracker instead, so it looks like he’s standing on it. This little trick helps to ground the image and stops it from feeling like it’s floating on the card.

Step 4: Finishing Touches
To finish the card and really follow the sketch, die cut red and white starlight candies using the same die set and adhere around the nutcracker and one to the top of his staff. They add a fun pop of colour and a bit of festive sparkle.
Final Thoughts
I’m really pleased with how this card turned out. The soft, embossed background keeps everything feeling light and wintry, while the bold nutcracker and touches of glitter bring in that classic Christmas charm. It’s a great example of how a strong focal image and a well-balanced sketch can do most of the design work for you.
If you don’t have these cute dies, you might also like to see my punch art nutcracker card.
If you’re feeling inspired, why not have a go yourself? Grab the sketch and join in with this week’s 52 Christmas Card Throwdown challenge. I’d absolutely love to see how you interpret it, whether you go traditional, modern, cute or quirky. Happy crafting, and I hope you’ll play along!


He’s fantastic – such a great card!
oh wow Gill, j’aime tellement ton interprétation, elle est magnifique, biz