

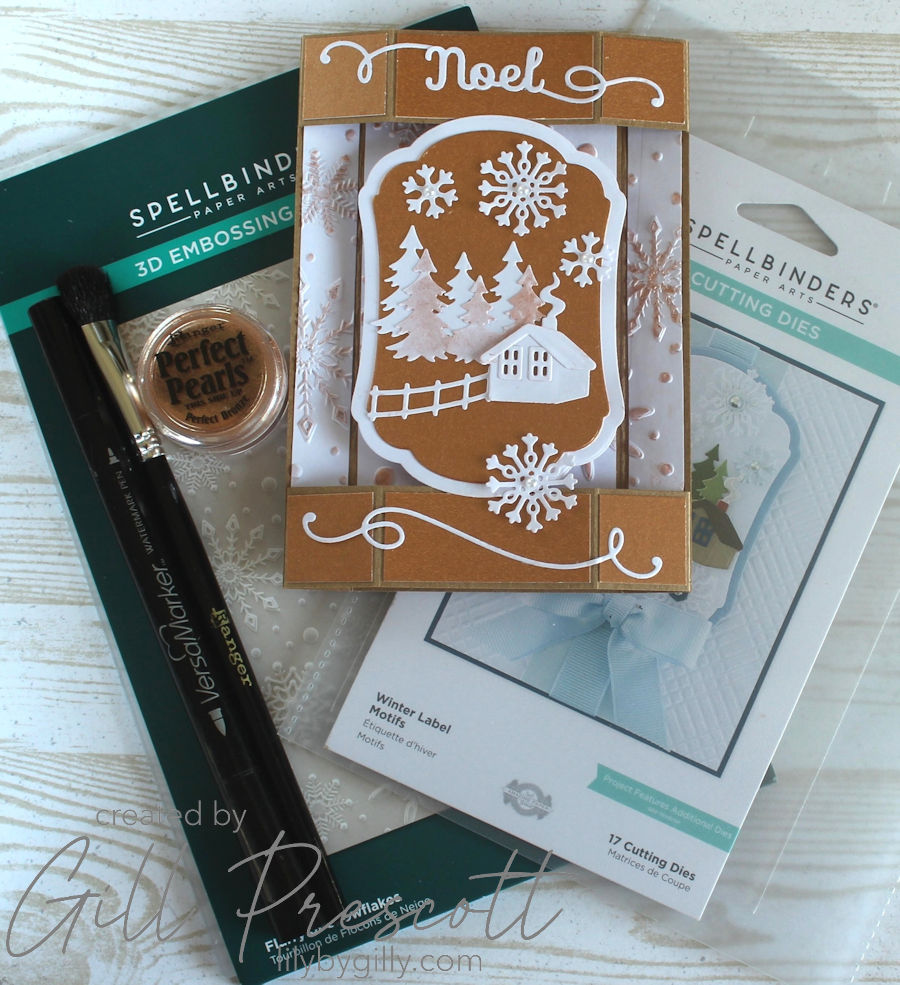
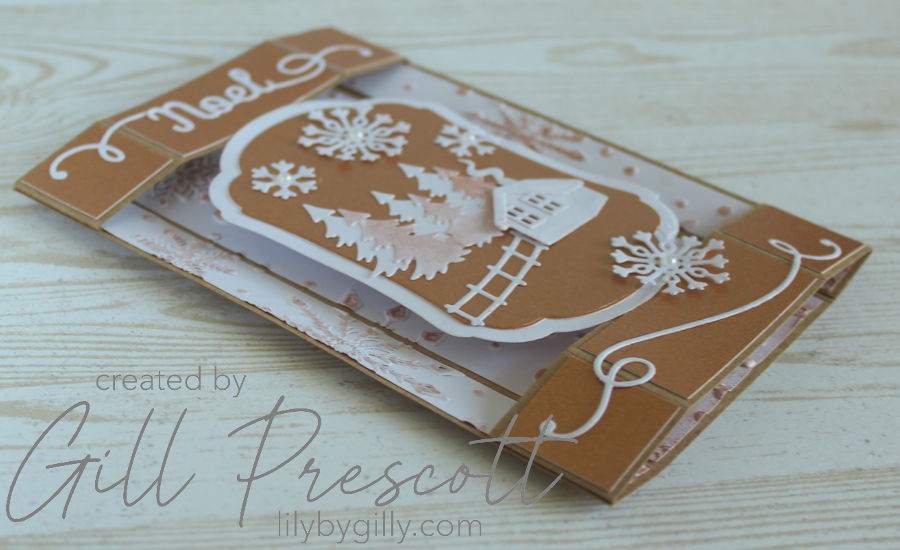
Creating a handmade Christmas card is a delightful way to share festive cheer, and participating in challenges at 52 Christmas Card Throwdown adds an extra layer of inspiration. This post guides you through crafting a hexagonal pop-up card, inspired by Louise at Iced Images, which folds flat for posting. I made my card to A6 size. This week’s colour challenge is a bronze, white, and kraft colour scheme, the inspiration for this card, which incorporates specific tools and materials for a sophisticated and elegant design.
Materials Needed:
- Cardstock: Kraft, white, and bronze
- Spellbinders Winter Label Motifs Die Set
- Spellbinders 3D Flurry of Snowflakes Embossing Folder
- Spellbinders die cut sentiment
- Perfect Pearls in Perfect Bronze by Ranger
- VersaMarker Pen
- Adhesive: Double-sided tape or glue
- Die-cutting and embossing machine
- White adhesive pearls
Instructions:
- Prepare the Card Base:
- Cut a piece of kraft cardstock to A6 size, 4 1/8 x 5 3/4 inches, scored at 3/4 on on each long side.
- Cut two strips measuring 1 x 5.5 inches, scored at 1/2, 1 1/2, 3 5/8, and 4 5/8.
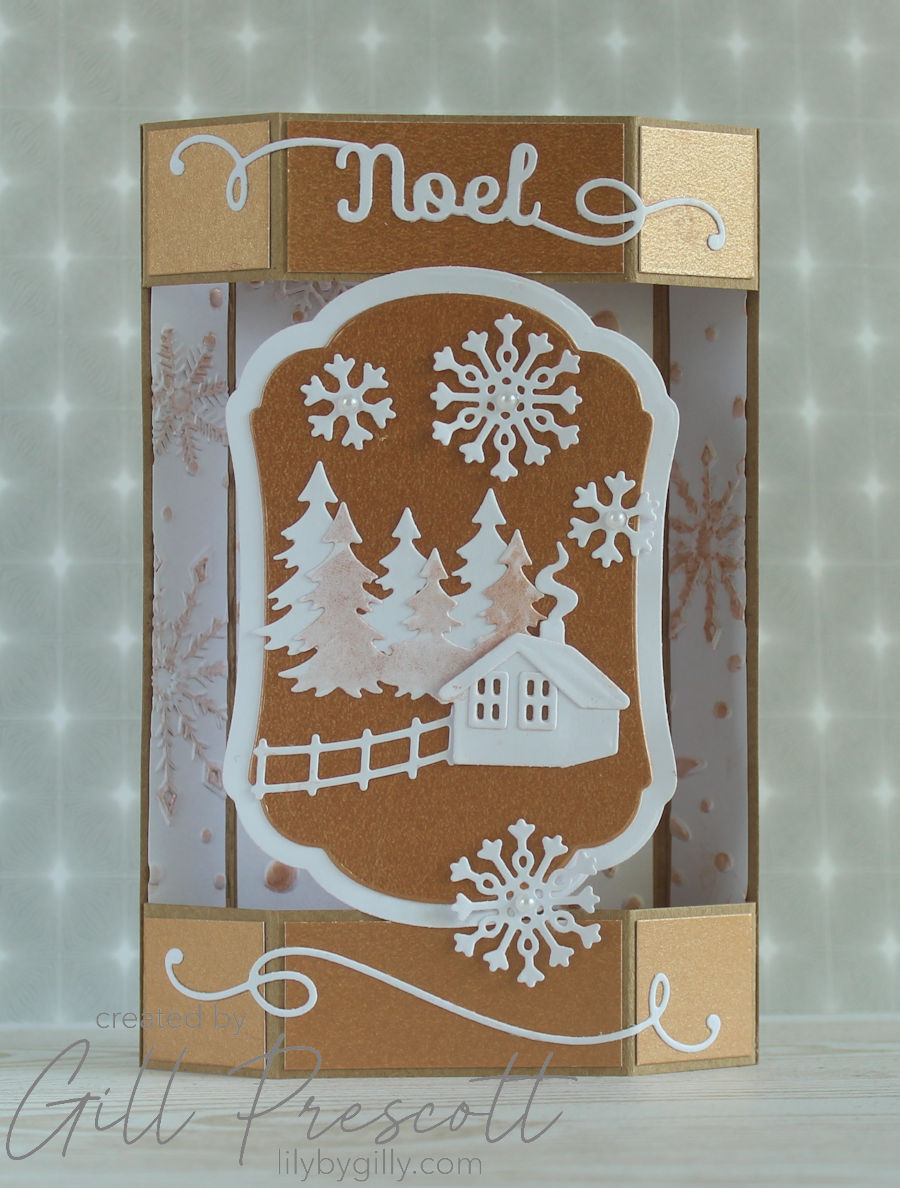
- Emboss the Background layer:
- Cut an A6 piece of white cardstock.
- Lightly mist both sides with water to prevent cracking.
- Place it inside the Spellbinders 3D Flurry of Snowflakes Embossing Folder and run it through your embossing machine to achieve a deeply textured snowflake pattern.
- Cut into strips to create mats to the background of the base card.
- Enhance with Perfect Pearls:
- Use the VersaMarker Pen to trace over selected snowflakes or areas you wish to highlight.
- Apply Perfect Pearls in Perfect Bronze over the inked areas.
- Gently brush off excess powder, revealing a subtle bronze shimmer that adds depth and elegance.
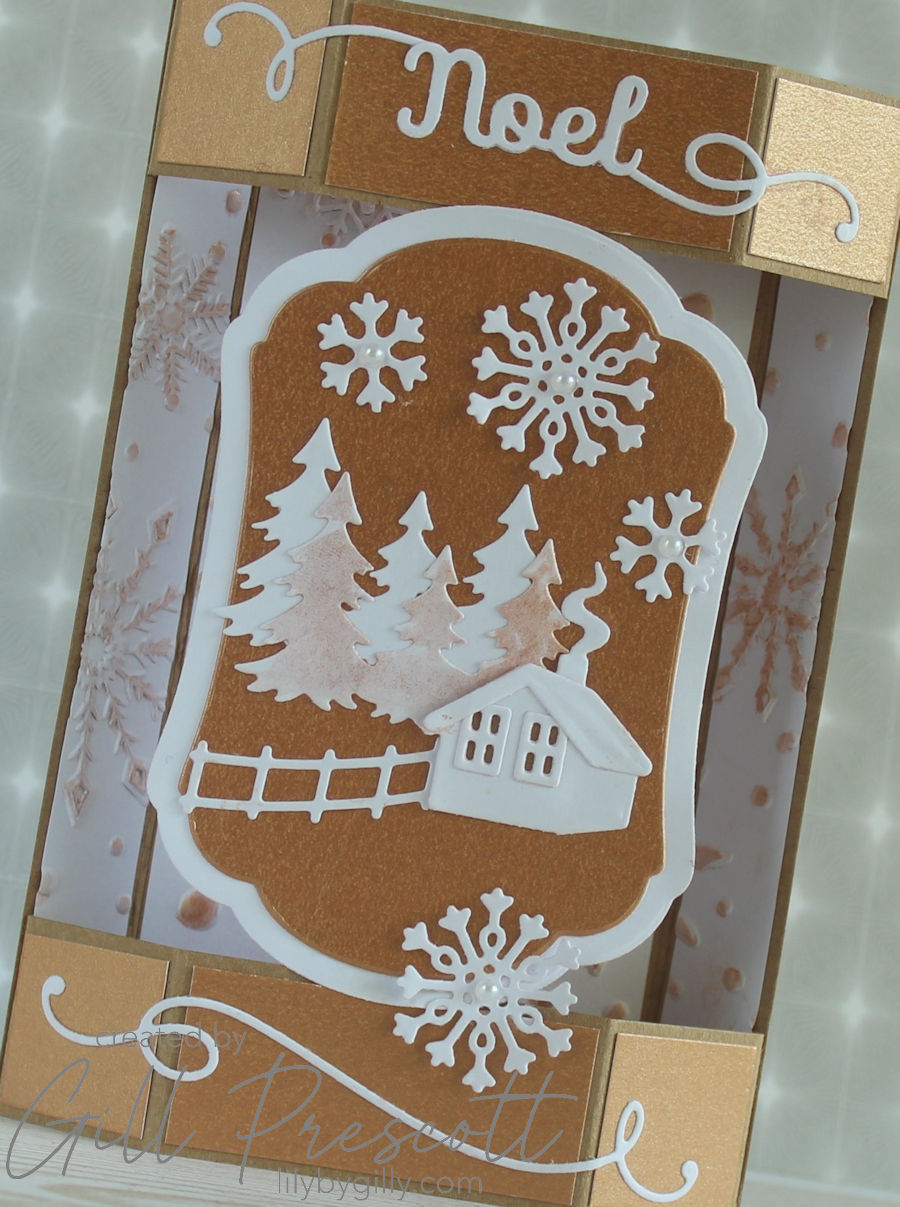
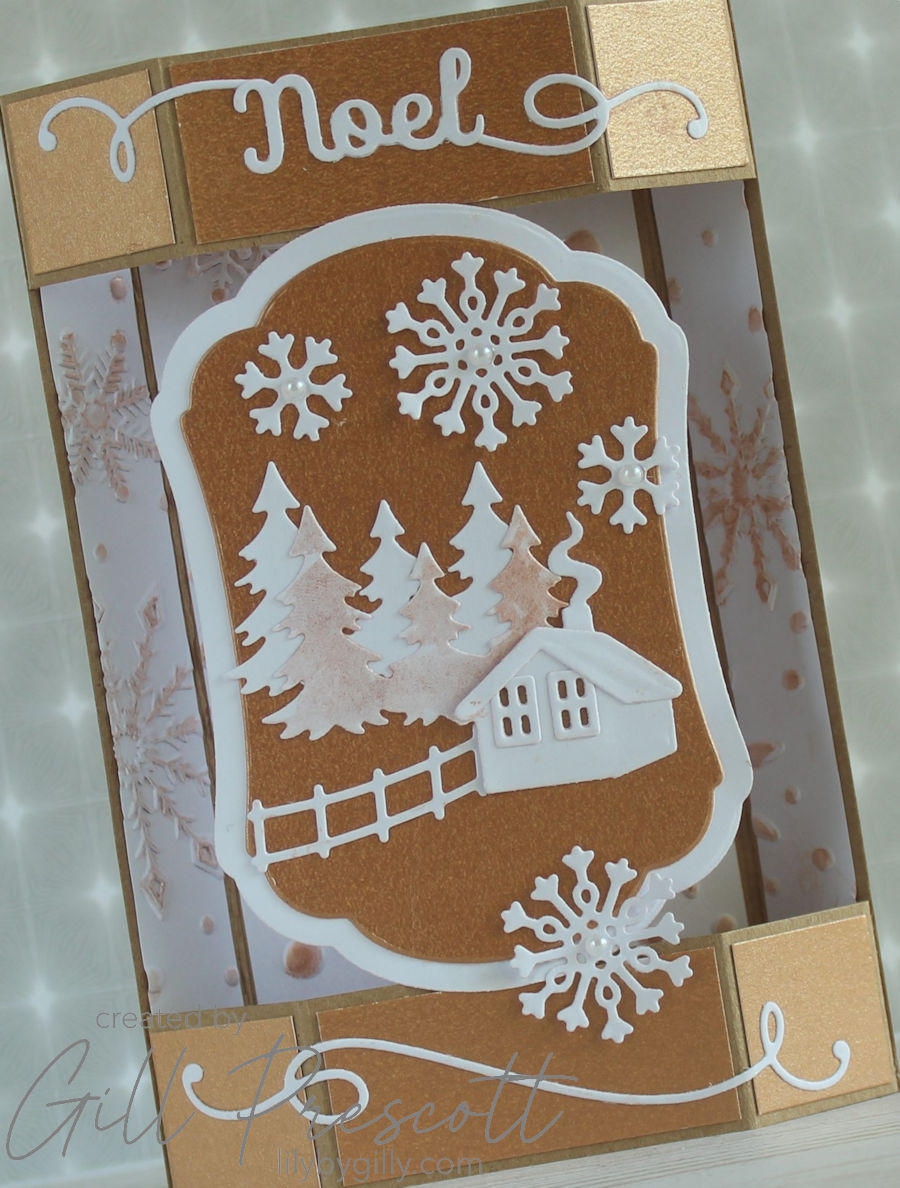
- Die-Cut the Motifs:
- Using the Spellbinders Winter Label Motifs Die Set, cut various elements from bronze and white cardstock.
- Add perfect bronze perfect pearls using versamark ink to one of the tree die cuts to add depth and shade.

- Assemble the Card:
- Adhere the embossed white card to the centre and sides of the kraft card base using double-sided tape or glue. I first adhered the kraft strips to one side of the base, top and bottom. I then added the snowflake embossed pieces to one side and the back panel. The last embossed piece was added after the 2 panel pieces were adhered to the base card, top and bottom.
- Add mats and layer pieces in bronze cardstock to the 3 sections of the panel strips, top and bottom.
- Position and adhere the die-cut motifs onto the centre panel of the card, arranging them to create a balanced and visually appealing design.
- Ensure that the bronze accents are prominently displayed to tie in with the colour challenge.
- Adhere flourish die-cuts from the same die set to the top and bottom of the card front.
- Add Finishing Touches:
- For added dimension, consider using foam adhesive behind some of the die-cut elements.
- Optionally, add a stamped or die-cut sentiment in white or bronze to complement the design – I used a Spellbinders die-cut sentiment.
- Add white adhesive pearls to the snowflake diecuts.
Tips:
- When using the 3D embossing folder, remember that a slight misting of water on the cardstock can help achieve a deeper impression without cracking the paper.
- Perfect Pearls can be set by lightly misting the card with water or using a heat tool to ensure the powder adheres properly.
- Experiment with the placement of die-cut elements before adhering them to find the most aesthetically pleasing arrangement.
By following these steps, you’ll create a beautiful Christmas card that not only meets the 52 Christmas Card Throwdown colour challenge but also showcases your creativity and attention to detail. The combination of bronze, white, and kraft, along with the intricate designs from the Spellbinders products, results in a card that’s both elegant and festive.
I hope you’ve been inspired to join the challenge at 52 Christmas Card Throwdown – we’d love to see what you make.
Happy crafting!

Wow what a winter wonderland of a card …I wish I was in that little log cabin🎄❄️
Krasna praznična voščilnica :-))
Všeč mi je, kako si uporabila moje barve. Zelo lepo si jo sestavila ❤️
A beautiful holiday card :-))
I love how you used my colors. You put it together very nicely
So glad you like it 🙂
wow Gill, tu relèves les défis avec tant d’élégance! c’est splendide!! biz