

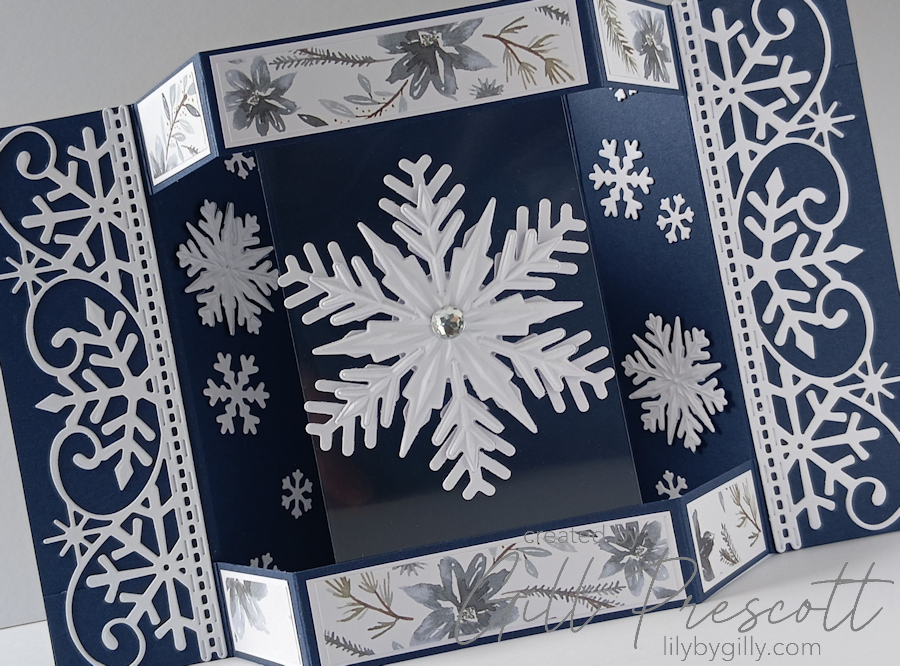
This week’s technique challenge over at 52 Christmas Card Throwdown is to create a floating bay window card — and what a fun fold this is! I love cards that have a real “wow” factor when opened, and this one definitely delivers.
The clever thing about this design is that although it opens out into a much larger decorative display, it still folds completely flat to fit inside a standard A6 envelope. Practical and impressive — definitely one for the mantelpiece rather than tucked away in a drawer!
Most of the tutorials I found online were designed for US letter-sized cardstock, so I decided to adapt the measurements to work with European A4 cardstock instead.
Here’s how I made it.
What You’ll Need
- Cardstock: Night of Navy, White
- Designer Paper: Coordinating winter or festive DSP
- Dies: Various snowflake dies
- Embellishments: Large rhinestone
- Other: Acetate, scoreboard, trimmer, strong adhesive, liquid glue
Step 1: Prepare the Card Base
Start with a sheet of Night of Navy cardstock.
Trim it slightly so it measures 8″ x 11¼” — this makes the scoring much easier to calculate for the floating bay window structure.
Along the long side, score at:
- 1⅞”, 3¾”, 7½” and 9⅜”
Next, turn the cardstock and trim away two strips measuring 1″ wide.
Step 2: Fold the Structure
Fold and burnish all the score lines carefully.
The fold pattern should go:
- Mountain fold
- Valley fold
- Valley fold
- Mountain fold
Once folded correctly, you’ll start to see the bay window shape forming.
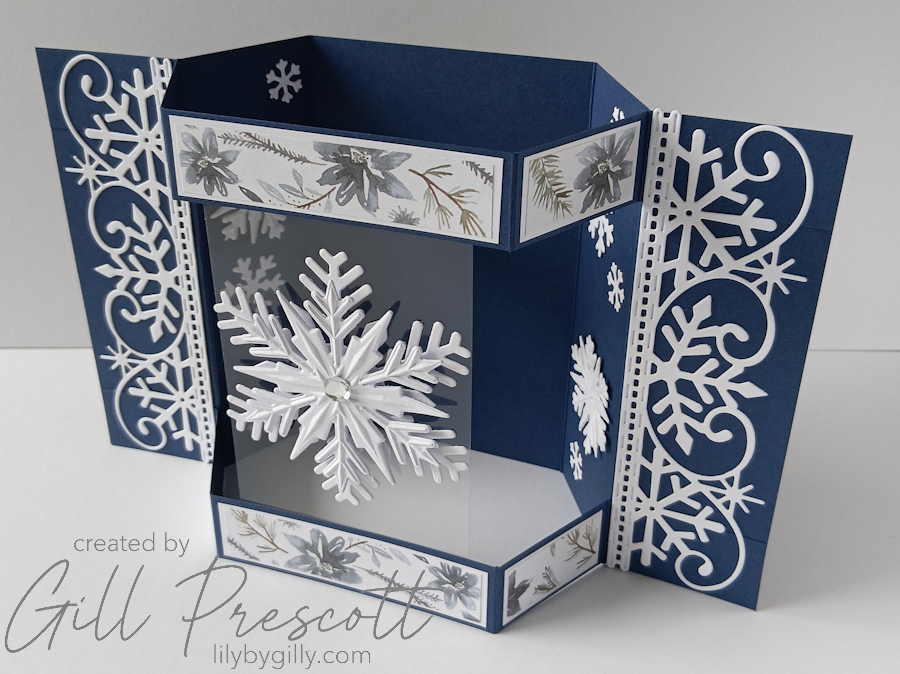
Step 3: Create the Floating Window
Take the two 1-inch strips you cut earlier and adhere them across the top and bottom sections of the outer panels of the card structure. These form the “window frame” effect and help support the floating centre.
Next, cut a piece of acetate measuring 5½” x 3″ and adhere it to the inside of the centre front panels.
This acetate panel creates the illusion of the floating centre section and gives the card that lovely dimensional look when opened.
Step 4: Decorate the Card
For my design, I kept to a crisp Night of Navy and white colour scheme, which feels beautifully wintery and elegant.
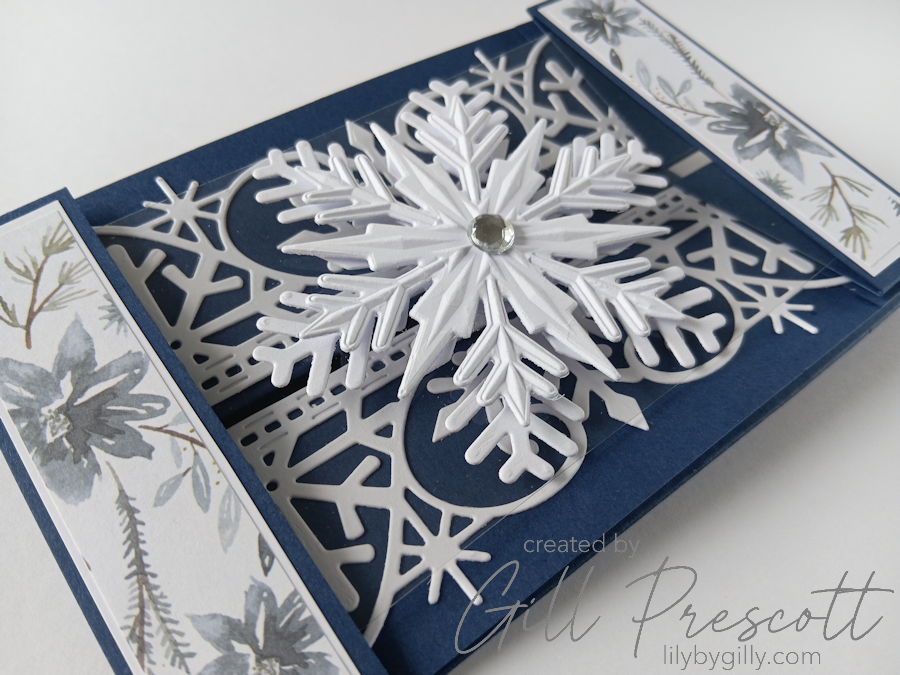
I used a variety of white snowflake die cuts to decorate the card, arranging them across the panels and around the acetate window section.
To tie everything together, I added strips of coordinating designer paper across the top and bottom sections of the card.

Step 5: Add the Finishing Touches
To finish, I added a large rhinestone embellishment to the centre of the large snowflake die cut for a little sparkle and shine.
Because the overall design is fairly clean and monochromatic, the rhinestone catches the light beautifully without overwhelming the card.
Final Thoughts
I absolutely loved making this card. It’s one of those folds that looks really impressive when opened, but once you understand the scoring, it actually comes together surprisingly easily.
The floating centre gives it such a special feel, and the fact it still folds flat enough for an ordinary envelope makes it even better.
If you’ve never tried a floating bay window card before, this week’s 52 Christmas Card Throwdown challenge is the perfect excuse to give it a go. It’s a brilliant technique for creating a real showstopper card — and I guarantee the recipient will open it more than once just to admire how it works!
Happy crafting!


Wow! That is absolutely gorgeous Gill – such a fabulous design! Your instructions are so clear too – I ran out of time to get my DT card made this week but am definitely going to give this a go
Absolutely stunning!
I love that it’s just inky blue, which amplifiers the white…Magical.
oh wow Gill, elle est si élégante et chic, bravo, biz