

This week’s theme challenge at 52 Christmas Card Throwdown is wild animals. Christmas is the perfect time to let your creativity shine, and what better way to spread Christmas cheer than with a handmade card? If you’re looking to craft something truly enchanting, Lavinia Stamps’ range is a must-try. In this blog post, I’ll share how I created a whimsical wild winter wonderland using Lavinia’s Wild Hares, Tree Scene, Mini Meadow Mushroom, Mystic Swirl, and Winter Magic stamps. Grab your inks, and let’s dive in!
Step 1: Gathering Your Materials
Before starting, I made sure I had everything I needed:
- Lavinia Stamps: Wild Hares, Tree Scene, Mystic Swirl, Winter Magic
- Distress Oxide Inks (variety of colours)
- Versafine Clair Nocturne Ink
- White Posca Pen
- Glitter
- Quickie Glue Pen
- Blending brushes or sponges
- Sturdy cardstock (preferably in a smooth white)
- Acrylic block or stamping platform
Tracey Dutton from Lavinia Stamps has an excellent tutorial on YouTube that served as my guide for this project. You can find it here.
Step 2: Building the Background
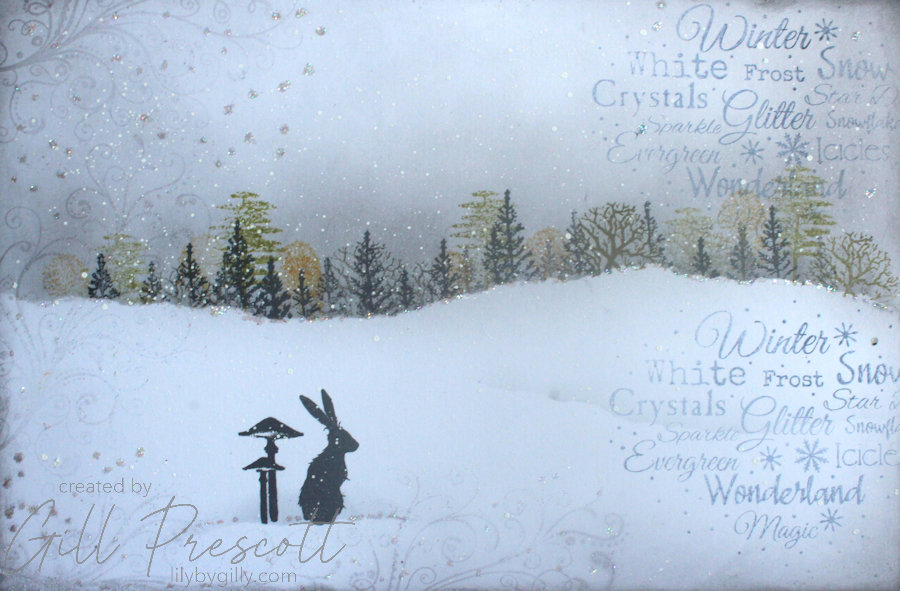
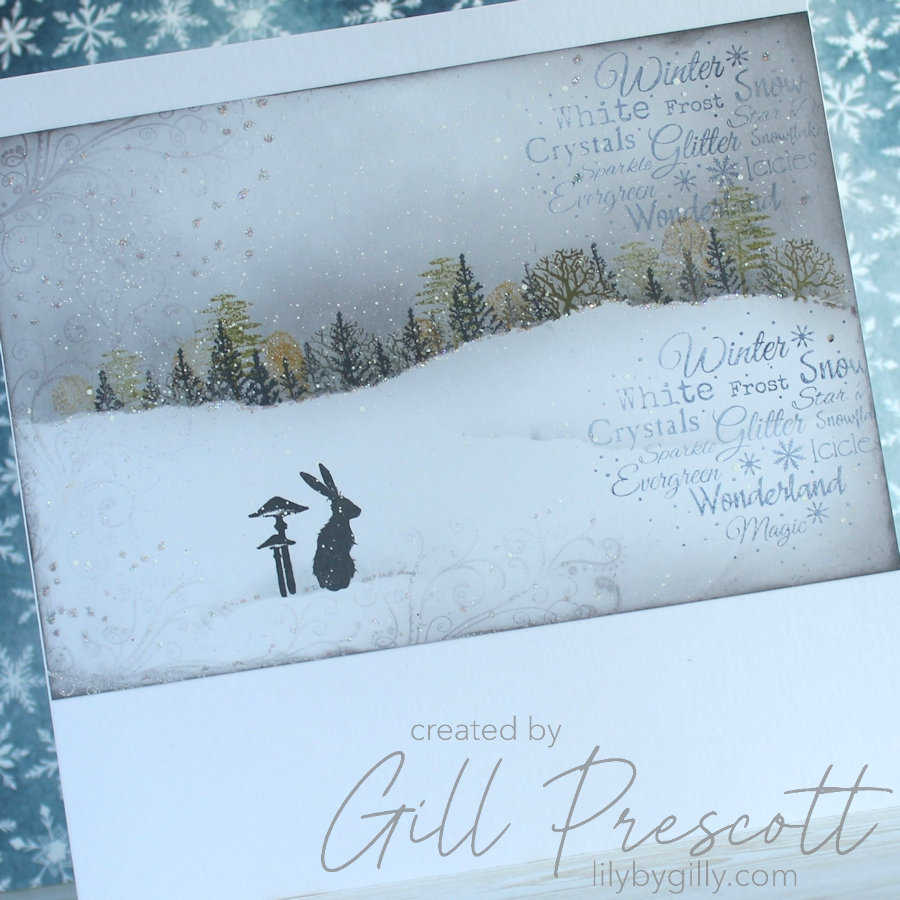
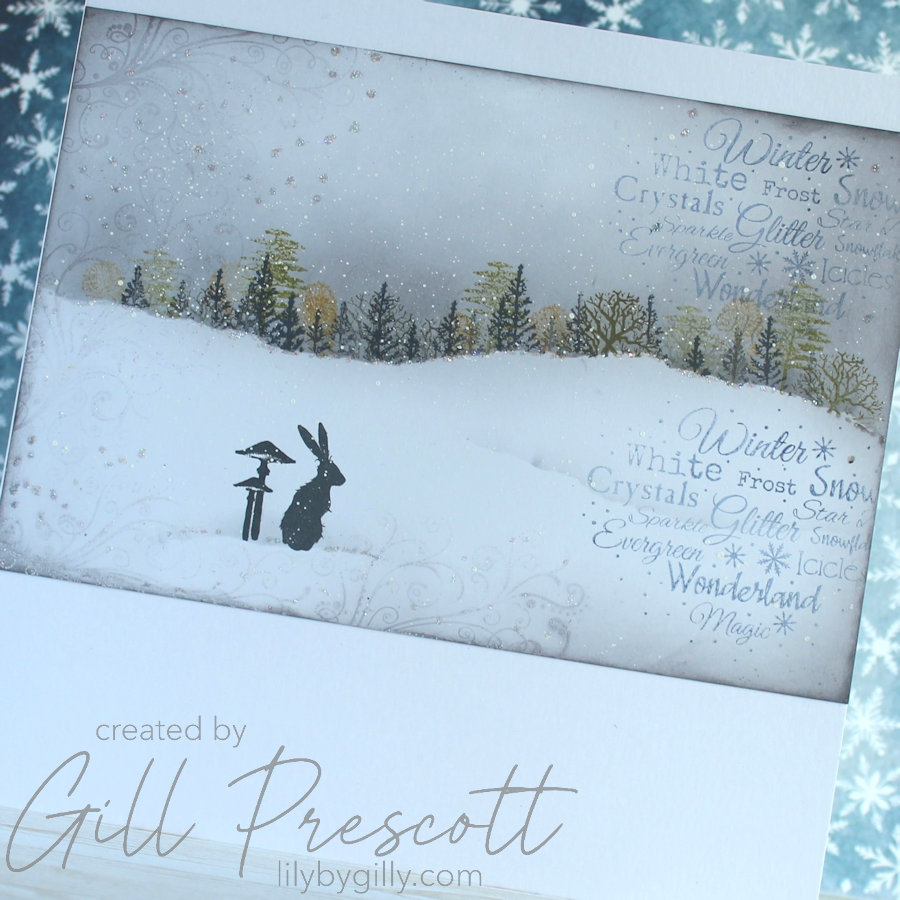
I began by creating the magical winter sky and tree line using Distress Oxide Inks. Blending is key here to achieve that smooth, ethereal look. Start with lighter colours and gradually build up darker shades. For my card, I chose a palette of browns, greens and grey, and used both first and second generation inking to evoke a frosty wintery look.
Using a blending brush, I worked in circular motions, to add colour to the wintery sky. For added depth, I masked areas and added subtle shading to the scene in grey.
Step 3: Stamping the Scene
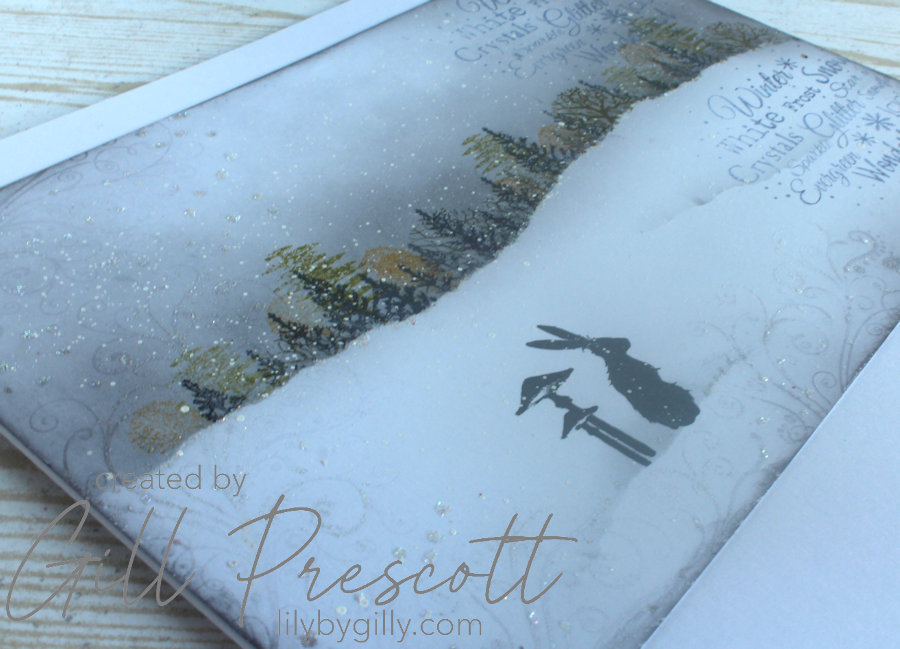
Once my background was dry, it was time to bring the scene to life. The Wild Hare and Mini Meadow Mushroom were the focal point, the hare pausing from his hop in the snowy landscape, and stamped using Versafine Clair Nocturne ink. To add movement and a sense of magic, I used the Mystic Swirl and Winter Magic stamps sparingly, using second generation stamping, creating a sense of snow flurries dancing in the breeze.
A stamping platform really came in handy here to ensure crisp impressions, especially on the detailed designs.
Step 4: Adding Snow and Sparkle
What’s a Christmas card without a touch of snow? I used a white Posca pen to create snowflakes by gently splattering the ink across the scene. A quick tip: tap the pen lightly against another object for fine splatters.
For an extra frosty touch, I used a Quickie Glue Pen to trace certain elements of the scene—the snowy hill line and swirling snow—then sprinkled glitter over the glue. The sparkle catches the light beautifully and gives the card a magical finish.
Step 5: Final Touches
To complete the card, I mounted the artwork onto a plain white 10 in square base card. A handwritten Christmas greeting inside added a personal touch.

Why I Love This Project
Using Lavinia Stamps made it easy to create a professional-looking card with layers of depth and charm. The intricate designs, combined with the playful use of inks and textures, result in a card that’s not just a greeting but a piece of art.
If you’re looking for inspiration or new techniques, I highly recommend checking out Tracey Dutton’s tutorial. Her guidance makes even complex-looking designs achievable, no matter your skill level. I followed her instructions as closely as I could with the inks and tools I had.
Have you tried using Lavinia Stamps for your Christmas cards? Share your creations in the comments below and over at 52 Christmas Card Throwdown —I’d love to see them! Happy crafting!

Now isn’t that a view to behold!
i love the panoramic, the unspoilt beauty and the solitude of a single hare, you feel for him. It could be Narnia…love it.
wow Gill, tu relèves le niveau a une autre hauteur, que c’est beau et emplis de charme et de magie, biz
Gill, čudovita je tvoja tokratna praznična voščilnica ❤️ Všeč mi je zajček dolgouhec :-))