
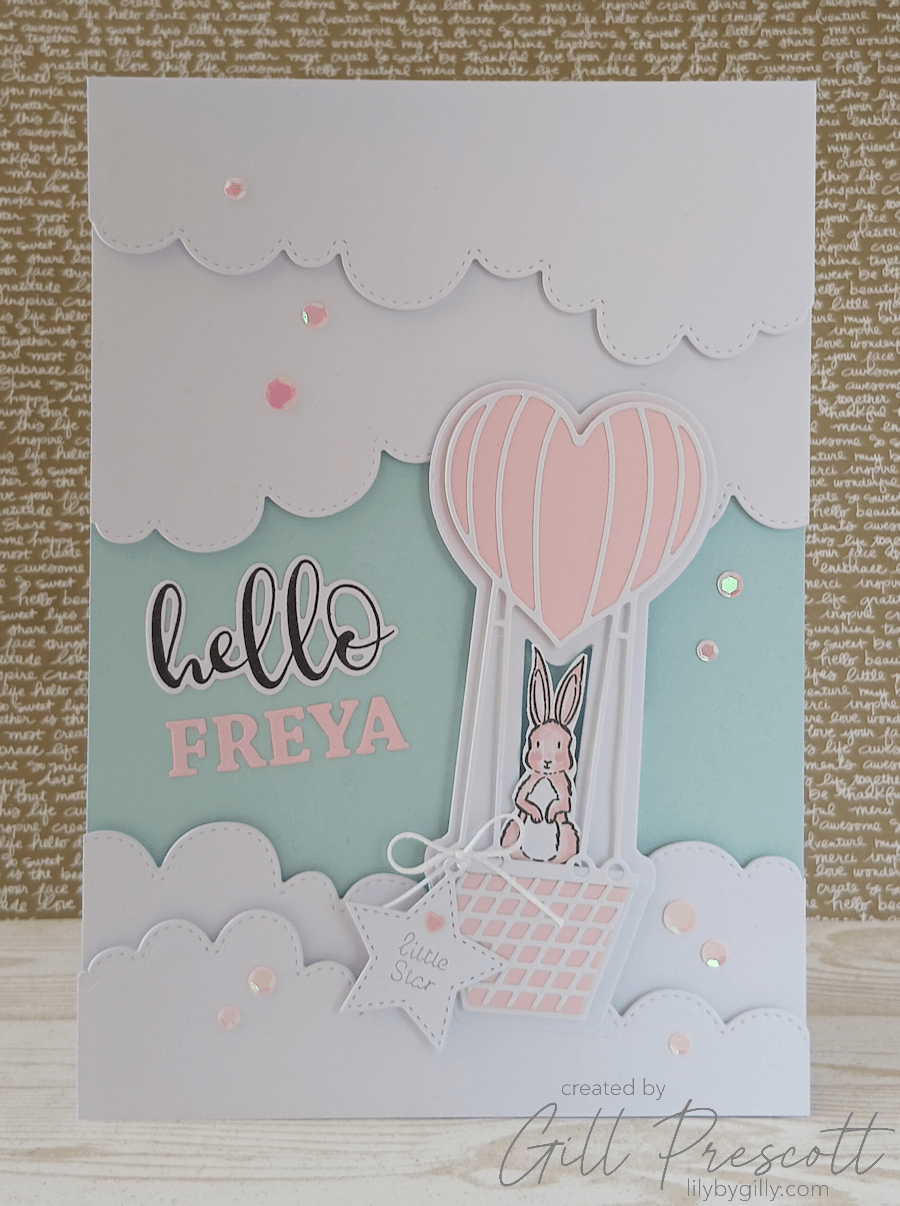
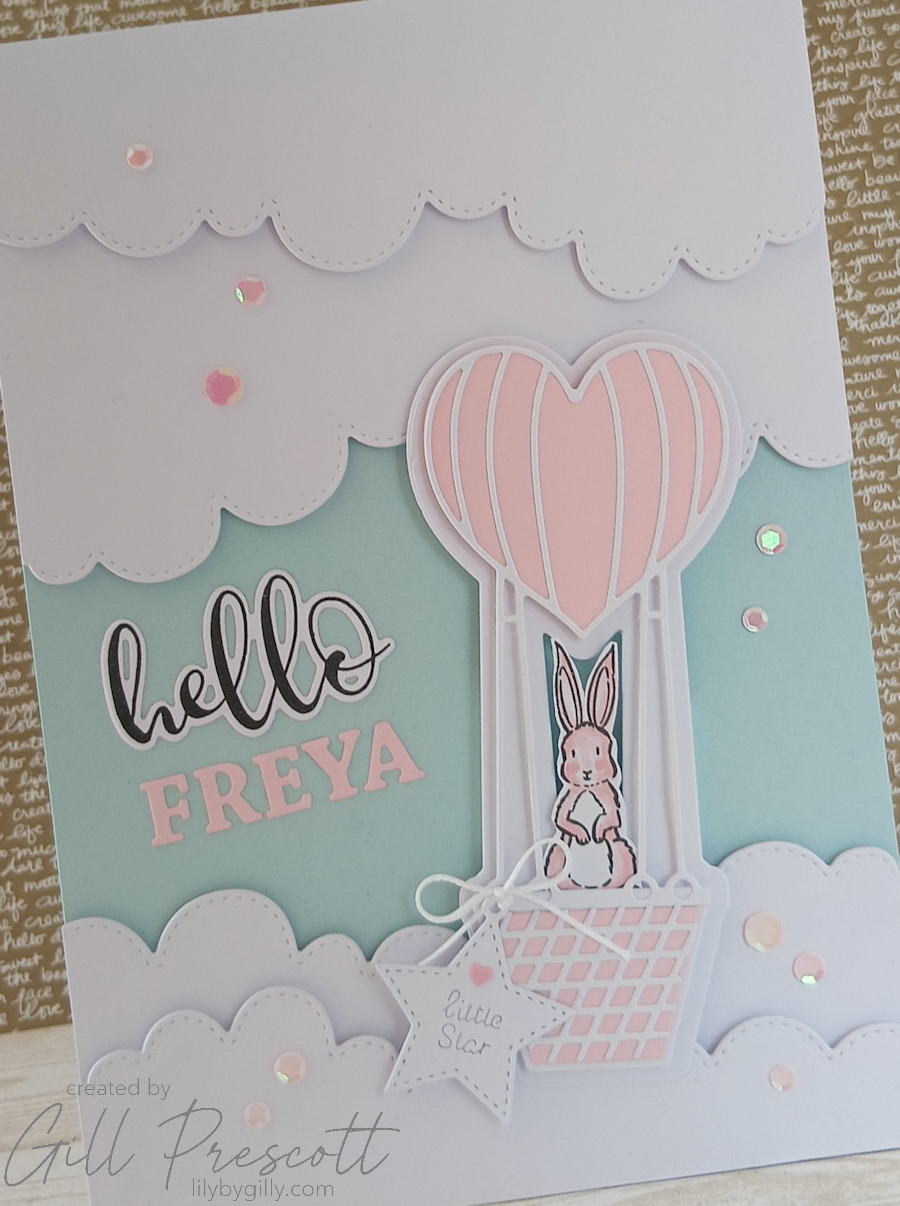
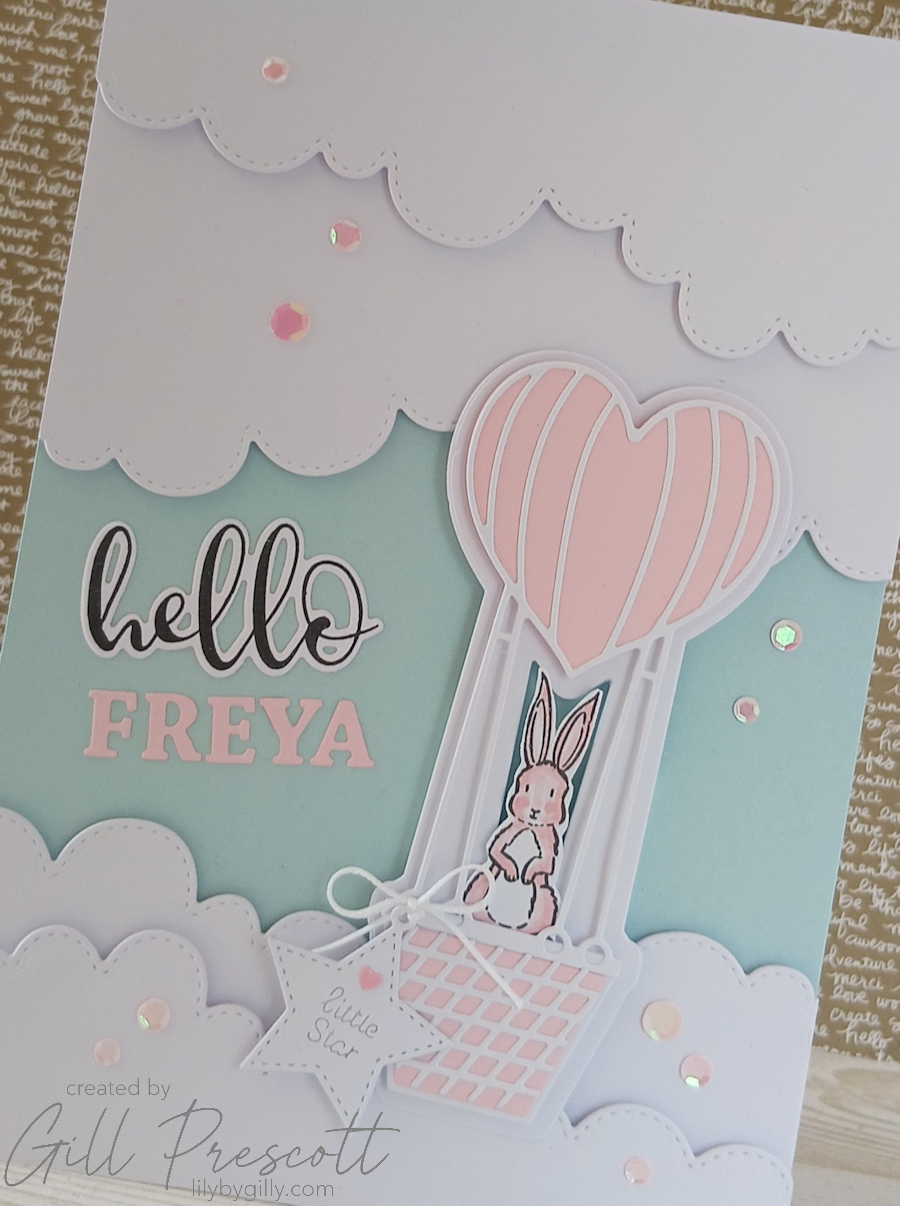
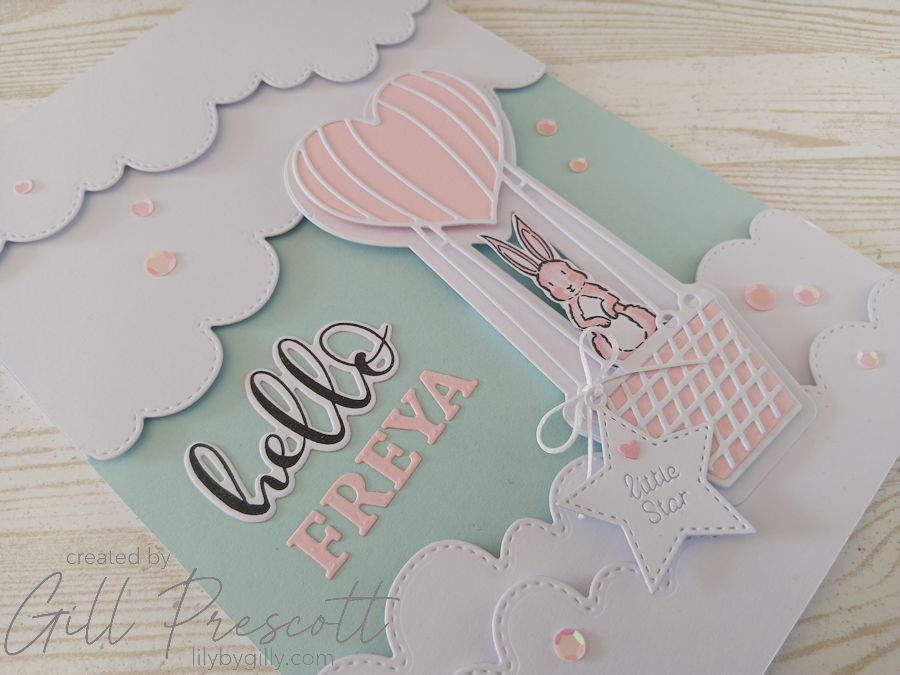
After making a baby boy version for a recent colour challenge, I couldn’t resist creating a baby girl card in a similar style for a dear friend who has just become a grandmother to a beautiful little girl, Freya. It felt especially meaningful to make, knowing just how much this little one has been hoped for and longed for. Soft skies, fluffy clouds and the sweetest little balloon scene… it’s one of those designs that just feels gentle and joyful from start to finish.
Switching the palette to Soft Sky and Pink Pirouette gives it a completely different feel, while keeping that same dreamy look. Here’s how it all came together.
What You’ll Need
- Cardstock: White, Soft Sky, Pink Pirouette
- Dies:
- Love is in the Air die set (Craft Addiction UK)
- Christmas Mini Tags dies (Craft Addiction UK)
- Stitched Hills and Clouds dies (Creative Expressions)
- Stamps:
- Storybook Animals by Beyond Stamping
- Spellbinders Stamp & Die of the Month – November 2023 (sentiment)
- Ink: Versafine Clair Nocturne pigment ink, Pink Pirouette ink
- Embellishments: Spellbinders pink sequins, tiny die-cut heart
- Other: White baker’s twine, foam adhesive, liquid glue
Step 1: Create the Card Base
Start with a full A4 sheet of white cardstock, scored and folded in half to create an A5 card base.
Cut a panel of Soft Sky cardstock and adhere it flat to the front. This forms the soft, dreamy sky backdrop for your scene.
Step 2: Add the Cloud Layers
Using the Stitched Hills and Clouds dies, cut several cloud borders from white cardstock in different sizes.
Arrange them across the top and bottom of the card, then adhere them using foam adhesive to create two layers of fluffy clouds. This adds lovely dimension and really helps build that soft, airy scene.
Step 3: Create the Balloon
Die cut the hot air balloon using white and Pink Pirouette cardstock, with the balloon and basket both in soft pink tones for a delicate, feminine look.
Once assembled, set it aside while you prepare the rest of the elements.
Step 4: Add the Sentiment and Name
Stamp your sentiment from the Spellbinders Stamp & Die of the Month (November 2023) in black ink onto white cardstock and die cut using the coordinating die.
For this version, I adhered the sentiment flat to the card for a slightly cleaner look.
To personalise the card, I die cut the baby’s name from Pink Pirouette cardstock and adhered it just below the sentiment. This really makes the card feel extra special and keepsake-worthy.
Step 5: Add the Sweet Little Passenger
From the Storybook Animals stamp set, I chose the forward-facing rabbit for a slightly different look. I love Josh’s stamp sets – he is such a talented illustrator and his stamp sets are just beautiful. This set is so versatile – I’ve used it previously on Christmas cards.
Stamp the rabbit onto white cardstock using Versafine Clair Nocturne ink, then colour it softly with Pink Pirouette ink and a blender pen. Once coloured, fussy cut the rabbit and place it into the balloon basket before adhering the balloon to the card, floating gently above the clouds.
It’s such a tiny detail, but it completely brings the card to life.
Step 6: Add the Finishing Details
Using the Christmas Mini Tags dies, cut a small star tag from white cardstock and emboss it with the words “little star.”
Tie a tiny bow using white baker’s twine and attach the tag to the edge of the balloon basket. To finish it off, add a tiny pink die-cut heart to the star for an extra sweet touch.
Finally, add a sprinkling of pink sequins across the sky for just a hint of sparkle.
Final Thoughts
I absolutely love how soft and delicate this card feels. The combination of Soft Sky and Pink Pirouette creates such a gentle colour palette, and the layered clouds and floating balloon give it that dreamy, storybook quality. It’s also a lovely reminder of how easy it is to adapt a design — simply by changing the colours and a few details, you can create something new.
If you enjoyed making (or seeing!) the baby boy version, this is a perfect companion piece — and such a thoughtful way to welcome a new little arrival.
Happy crafting!


Now that is sweet but I also like the depth you’ve built into it.
That’s just beautiful! I love the soft tones and the bunny in the balloon is adorable