
It’s time for another challenge at The Male Room, and this month’s challenge is “Hobbies”, which runs from 1st July to 4th August 2026.
![]()
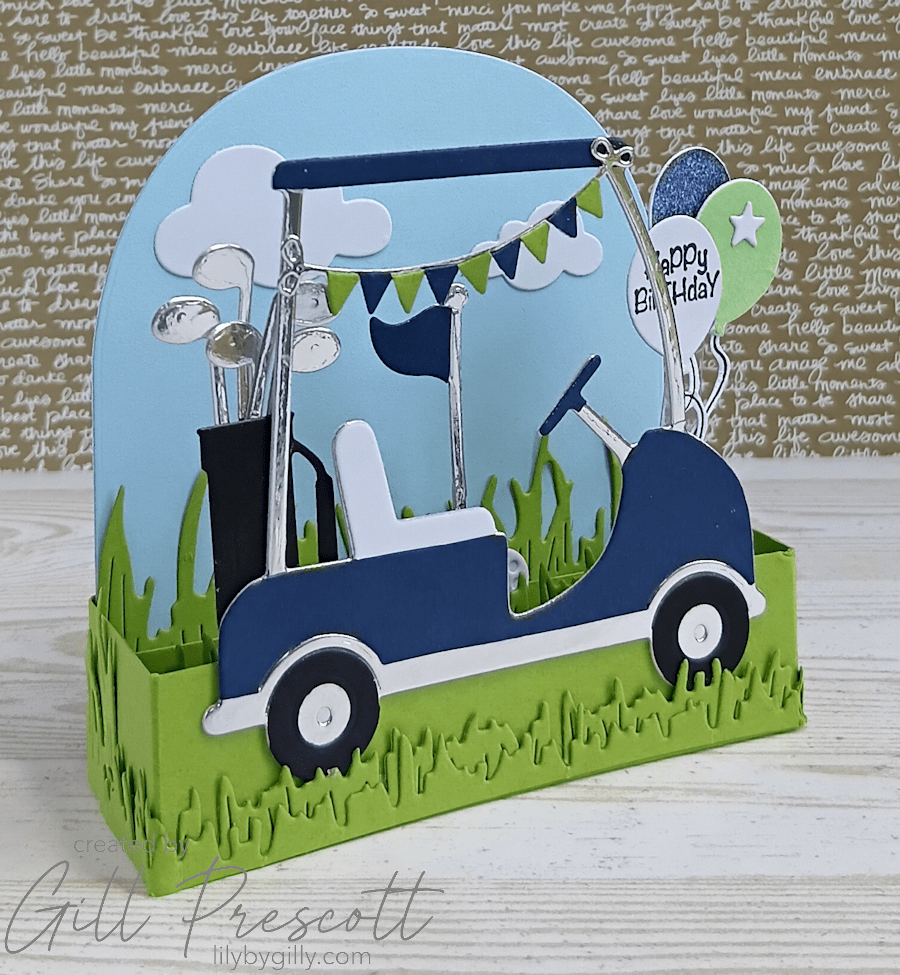
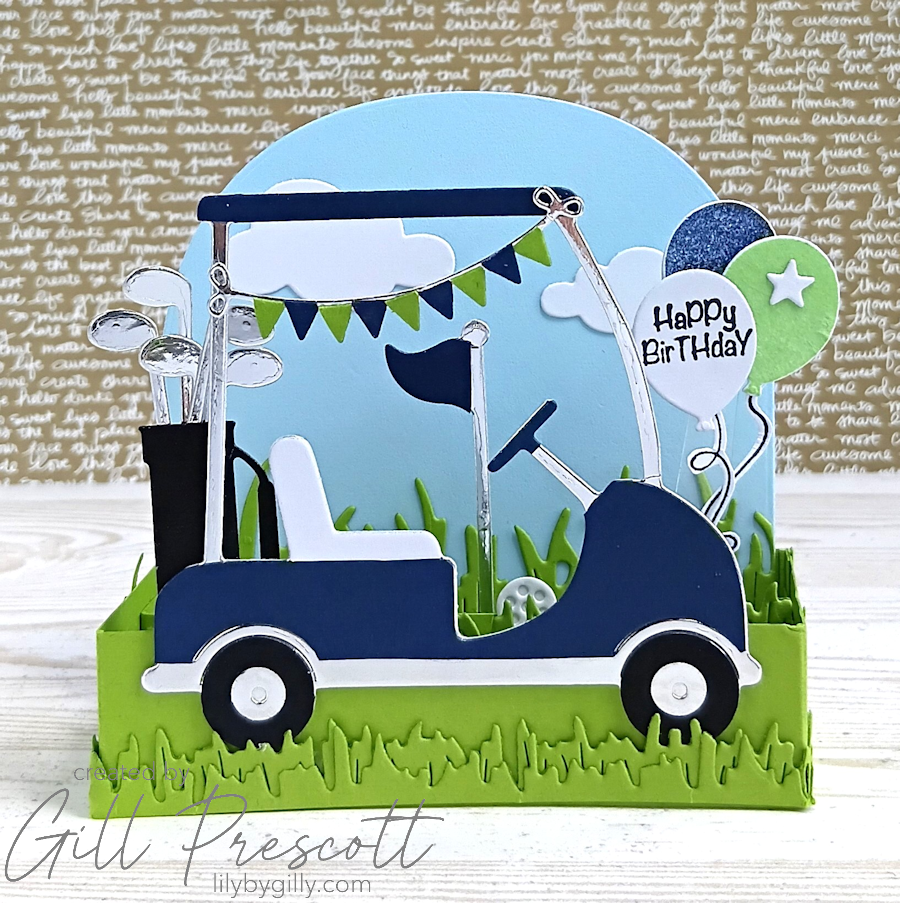
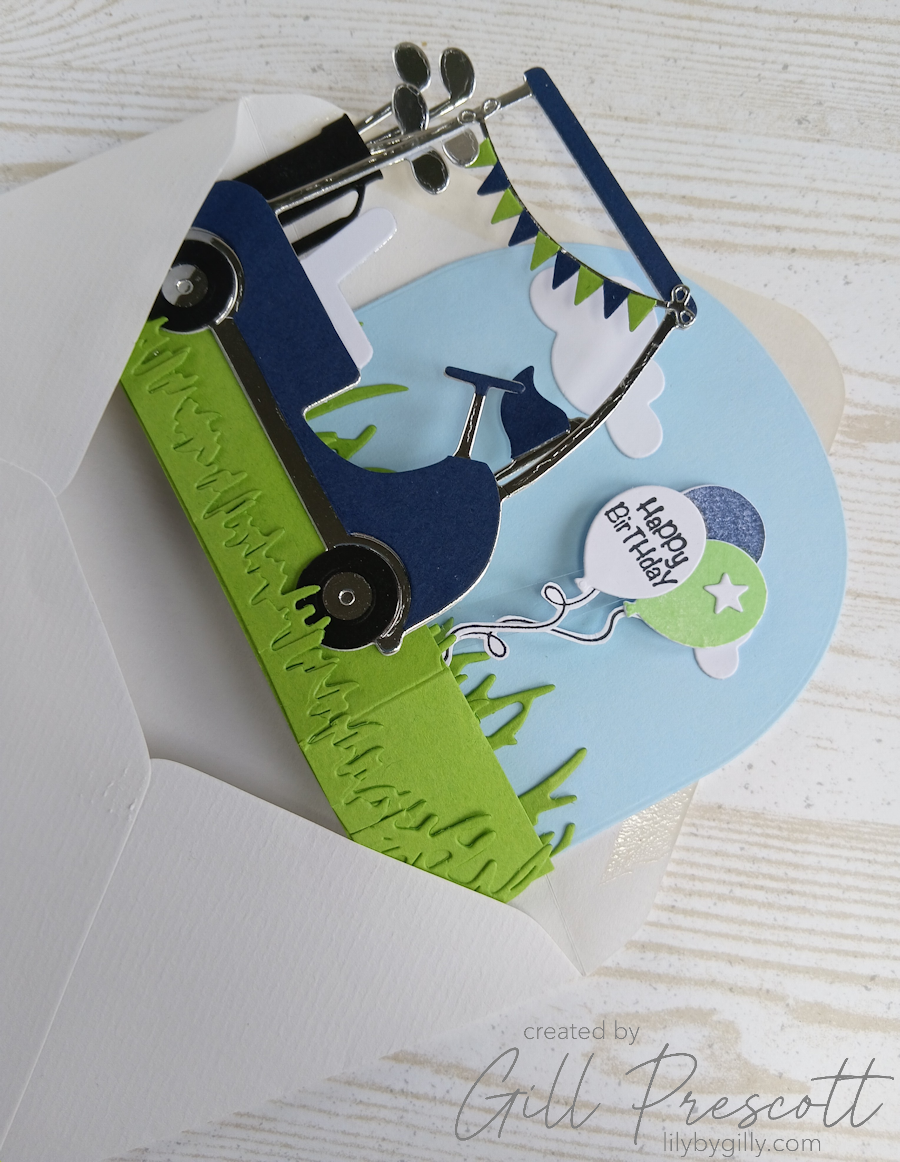
As soon as I saw the theme, I knew exactly where the inspiration for my Design Team card was coming from. My husband’s birthday falls in July and, as a very keen golfer, it was the perfect opportunity to create something especially for him. He’s always appreciated cards that are a little bit different, so rather than a traditional fold, I decided to make a pop-up box card. It folds flat for fitting in a regular size envelope but opens into a fun three-dimensional scene, making it just the sort of card he enjoys displaying long after his birthday. Here’s how I made it.
What You’ll Need
- Cardstock: lucky limeade, night of navy, bashful blue, silver and white
- Dies: golf cart, grass borders, arches, wavy double stitched circle, balloon (Beautiful Balloons Stampin’ Up), tiny banner and clouds
- Strip of heavy weight acetate
- Inks: black, night of navy and green galore
- Stamps – Cottontail Party Time set by Craft Addiction UK, Beautiful Balloons Stampin’ Up
- Adhesive: Strong liquid glue, glue dots
Step 1: Create the Box Base
To make the base of the box, cut a strip of green cardstock measuring 1″ x 11½”.
Score at: ½”, 2″, 6″ and 7½”
Fold and burnish all the score lines before adding adhesive to the ½” tab and securing it to the opposite end to form the box shape.
Next, cut two pieces of green cardstock measuring 5″ x 3/4″ to create the internal supports. Score each strip at ½” each end along the 5″ side, to fit across the box and adhere them inside to form the cross pieces that will hold the decorative elements.
Step 2: Create the Back Panel
For the backdrop, die cut a 4″ wide arch from white cardstock, then repeat using light blue cardstock.
Adhere the two arches together with the right sides facing out, creating a neat finish on both the front and back.
To transform it into a golf course, use a grass border die to cut several strips from green cardstock in different widths and lengths. Layer these along the bottom of the arch to create rolling fairways with plenty of depth and dimension.
The remaining grass strips were used to decorate the front and sides of the box and the internal cross supports, helping to carry the scene all the way through the card.
Step 3: Build the Golf Scene
The star of the card had to be the golf cart.
I die cut it from navy blue, white and silver cardstock before assembling all the pieces. Once complete, I adhered it to the centre front of the box, tucking the wheels just behind the grass so it looked as though it was driving across the course.
Small details like this really help bring the whole scene to life.

Step 4: Add the Finishing Details
Now for the fun part!
To complete the golfing scene, I added:
- Two white die-cut clouds floating across the blue sky.
- A golf pin positioned on one of the inner cross panels.
- A golf ball sitting close to the pin, as though it’s just rolled onto the green.
To add a birthday feel, I stamped and die cut three balloons in white, green and navy blue. The birthday greeting was stamped onto the white balloon before all three were attached to a small piece of acetate, allowing them to appear as though they were floating above the golf course.
I also used the Hot Air Balloon die set by Sizzix to create a tiny layered banner in silver, navy and green, adding another little decorative detail.
Even with all this dimension the card still fits into a regular size envelope!
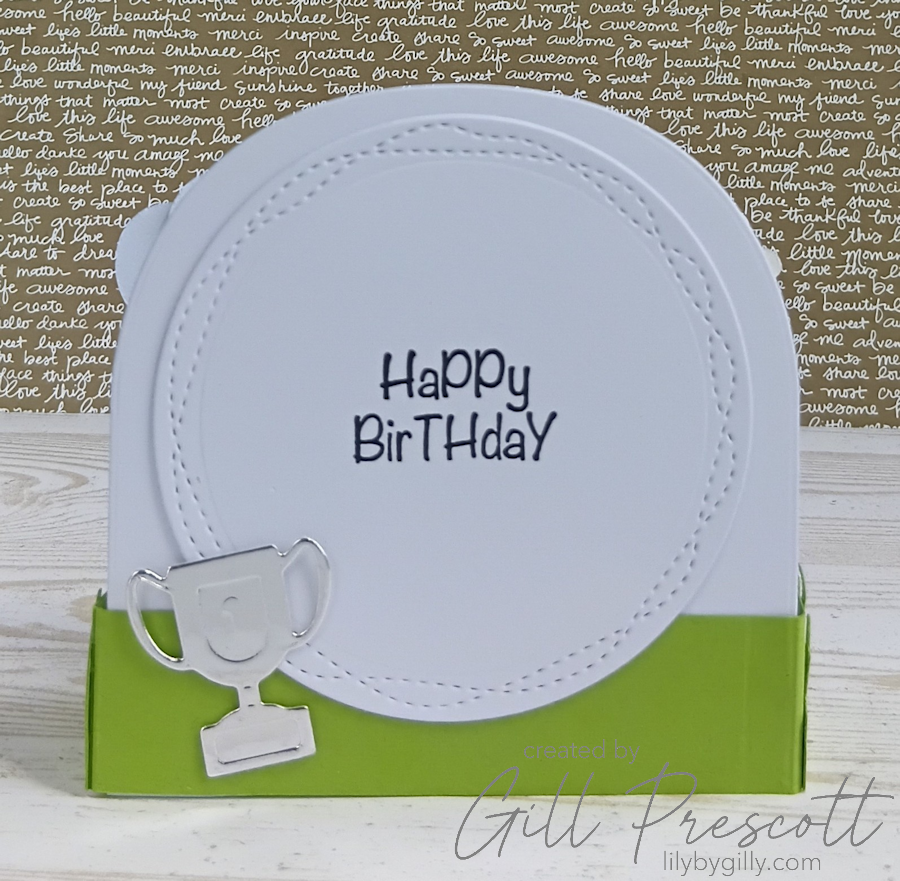
Step 5: Don’t Forget Somewhere to Write!
One thing I always think about with dimensional cards is where to write a personal message.
For this, I die cut a stitched circle from white cardstock, stamped a sentiment in the centre using black ink and adhered it to the back of the arched panel. It provides the perfect space for a handwritten birthday message without spoiling the scene on the front.
As a final flourish, I noticed the golf cart die set also included a winner’s cup, so of course I had to include it! I die cut it from silver cardstock and added it to the back panel — a little nod to every golfer’s dream of bringing home the trophy.
Final Thoughts
I had so much fun creating this card, and I have to admit it’s one of my favourite masculine makes for a long time. The pop-up box design turns a simple birthday card into a miniature scene, and all the golfing elements make it feel really personal.
Masculine cards can sometimes feel a little tricky to design, but building a scene around someone’s favourite hobby is a great way to make a card that’s both meaningful and memorable.
If you’re looking for inspiration this month, why not join us over at The Male Room and share a project inspired by a favourite hobby? Whether it’s golf, gardening, fishing, photography or something completely different, we’d love to see what you create!
Happy crafting!


love the construction and it makes me long for Summer golf days, sun, fresh air, gorgeous scenery and a nice walk… Strange a simple card can evoke such feelings, but this one does. Thanks.
That’s brilliant!