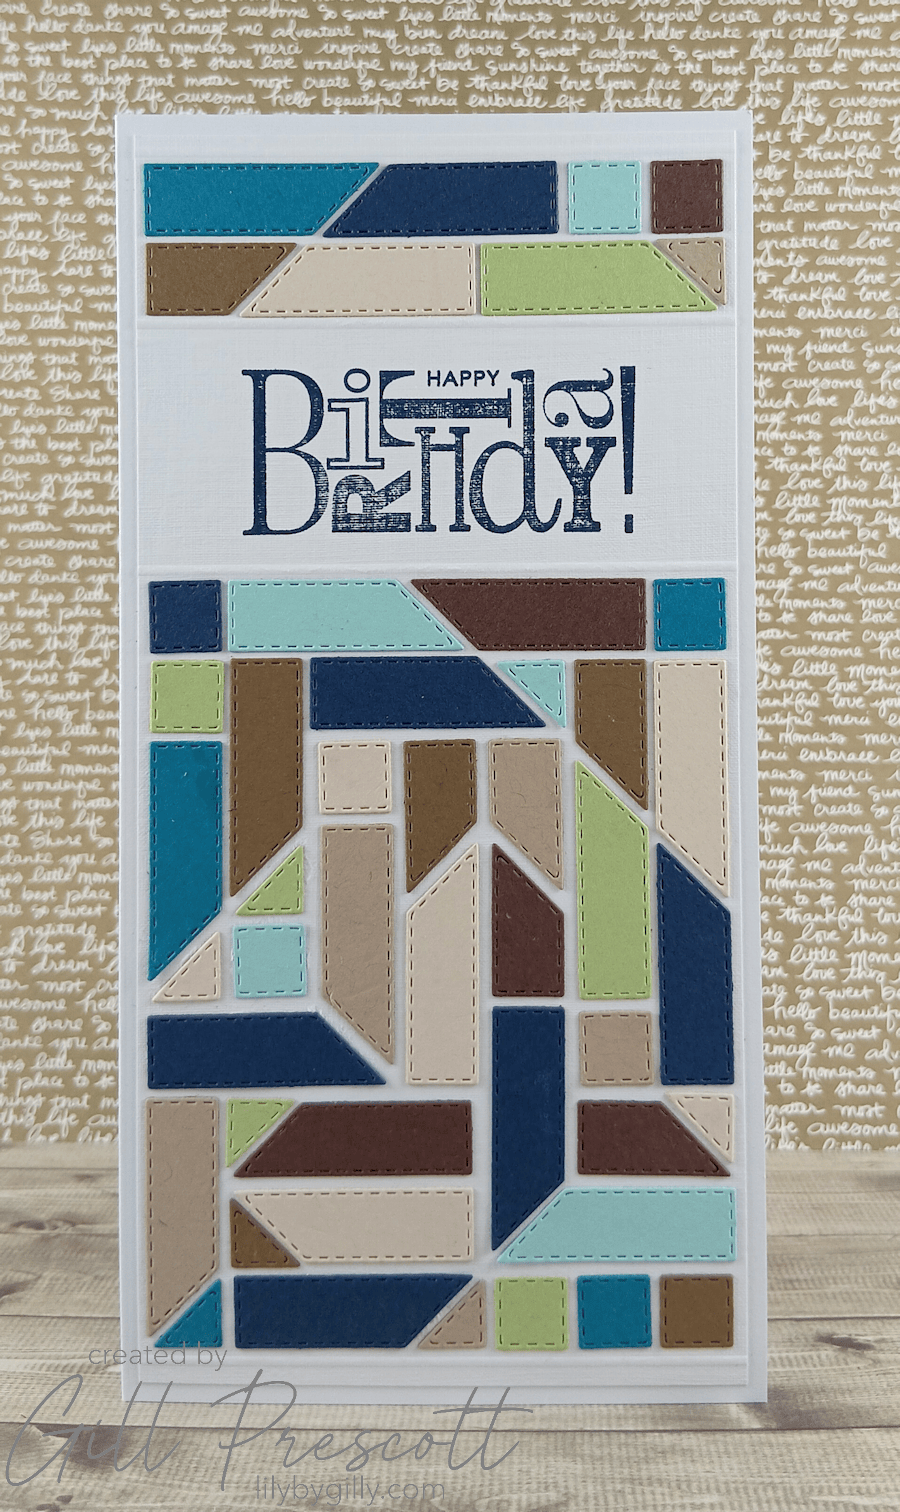
It’s time for another Design Team card for The Male Room, and this month our challenge theme is Geometric.

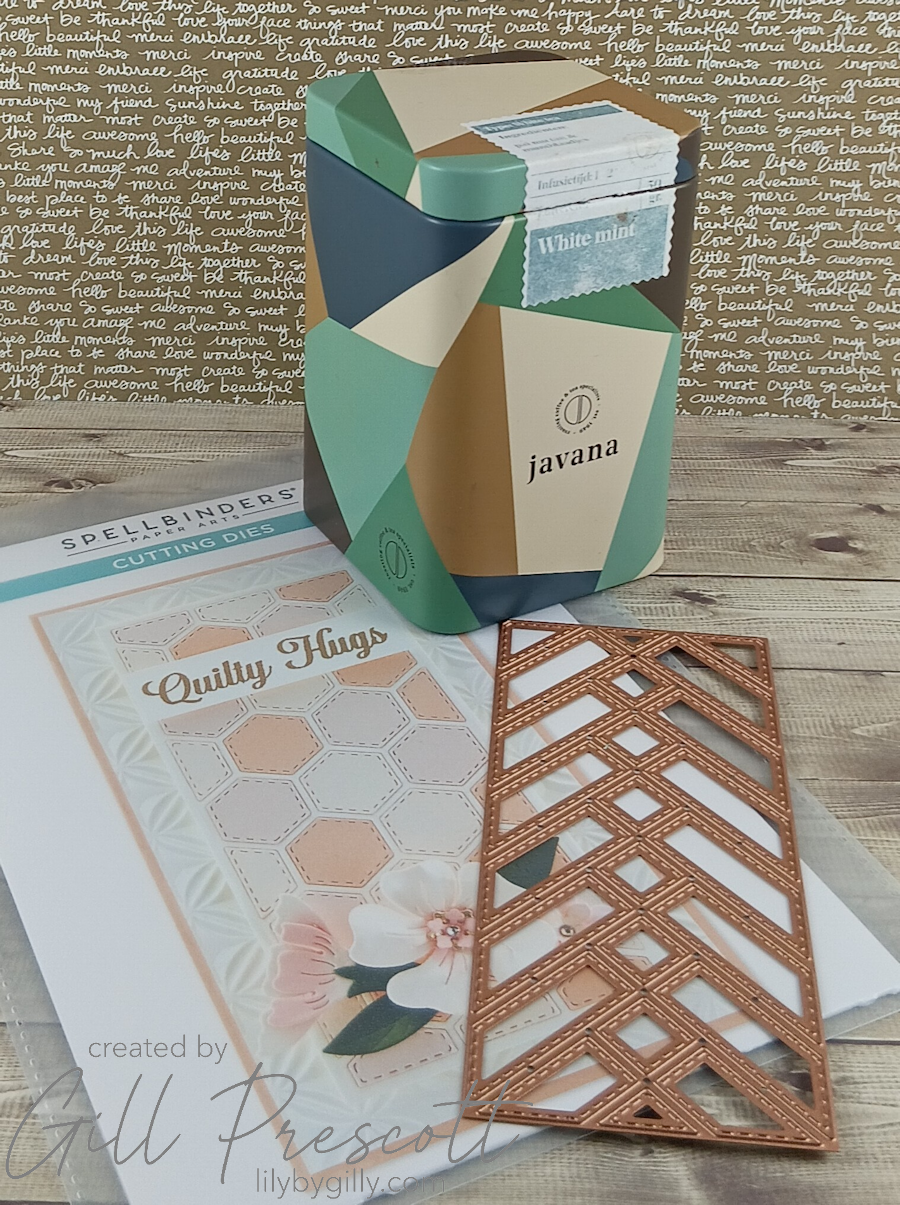
I always enjoy having a rummage through my die collection when a new challenge comes along, and this time I came across the French Braid and Hexagon Panels die set by Spellbinders. I was lucky enough to pick it up in one of their sales, but it had been sitting, unused, in my stash ever since! I knew straight away that it would be perfect for this challenge — although I decided not to use it quite how it was intended!
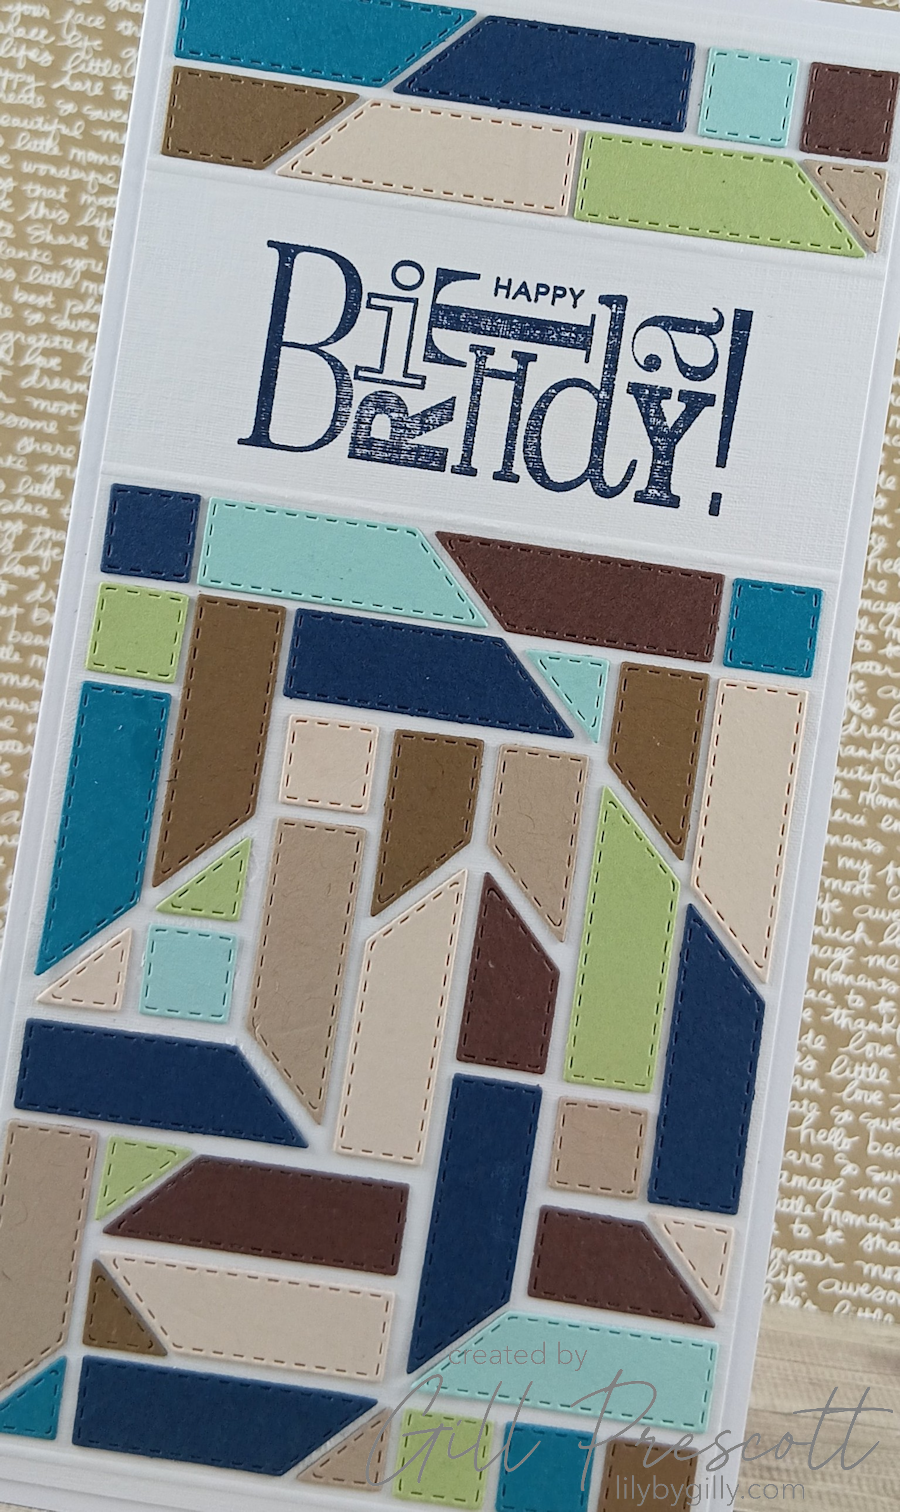
Rather than following the traditional French braid layout, I used the die to cut lots of different colours of card and then spent quite a while playing around with the pieces and trying different arrangements. I eventually settled on a much more mixed-up design, taking inspiration for both the pattern and the colour palette from a tin of mint tea that my daughter had given me.
I also had the perfect sentiment sitting in my stash. This very old Stampin’ Up! birthday greeting has all the letters going in different directions, which seemed absolutely made for this card! As I wanted plenty of room for both the sentiment and my geometric pattern, I decided that a slimline card would give me just the right amount of real estate.
Here’s how I made it.
What You’ll Need
- Cardstock: white linen, white, night of navy, pacific point, pool party, certainly celery, chocolate chip, soft suede, crumb cake, beige.
- Dies: French Braid and Hexagon Panels by Spellbinders
- Sentiment: Happiest Birthday Wishes by Stampin Up
- Ink: night of navy
- Tools: die-cutting machine, guillotine, scoreboard, stamp positioner
- Adhesive: liquid glue
Step 1 – Create the Card Base
For the base card, I cut a piece of A4 white cardstock to 8¼” square and then scored and folded it in half to create a slimline card.
I then cut a piece of white linen cardstock ⅜” smaller on both the length and width to create the front panel. The linen cardstock adds just a little bit of texture to the otherwise clean and geometric design.
Step 2 – Create the Geometric Pieces
This is where the fun — and the slightly obsessive part — began!
I used the Spellbinders French Braid and Hexagon Panels die to cut lots of pieces from cardstock in a selection of colours inspired by my mint tea tin. This certainly helped me use up lots of my paper scraps! Rather than assembling the pieces into the French braid pattern the die was designed for, I decided to mix things up a bit. I spent quite a long time moving the pieces around, trying different colour combinations and arrangements until I found a pattern I was happy with. I wanted something geometric, so the final design has a much more patchwork feel.
Once I was happy with the arrangement, I took a quick photo of it on my phone. This might sound like a small thing, but it was definitely worth doing! With so many individual pieces, I knew I would never remember exactly where everything went once I started gluing them down.
Step 3 – Add the Sentiment
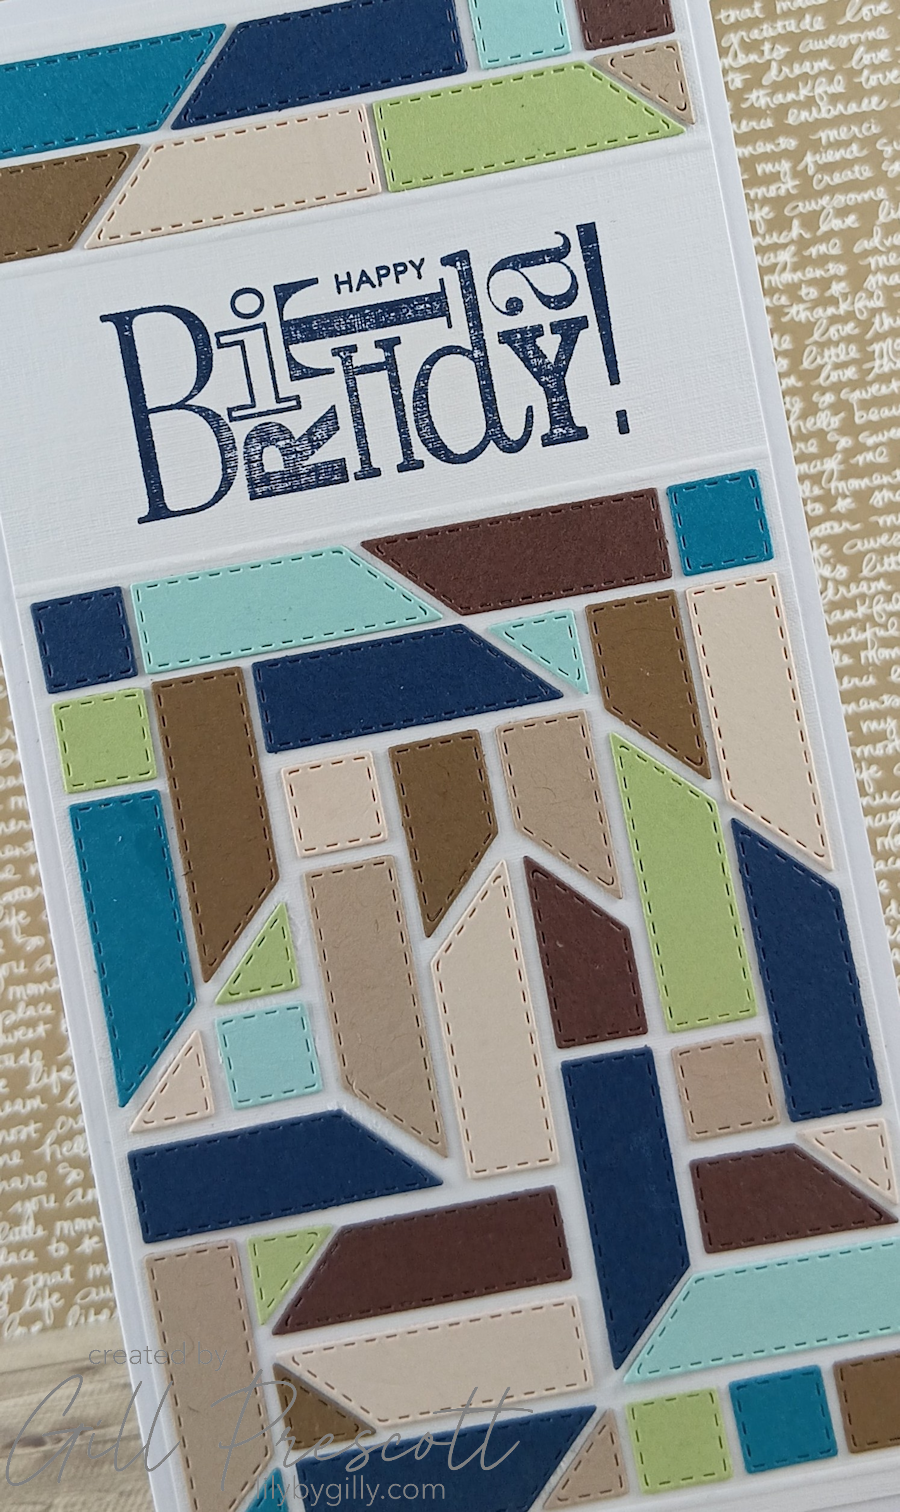
Before adhering any of the geometric pieces, I stamped my choice of birthday sentiment onto the white linen panel using Night of Navy ink. I positioned it in the top third of the panel, leaving plenty of room above and below for my geometric design.
I particularly love this old Stampin’ Up! sentiment because of the way the letters go off in different directions. It’s a quirky little detail, but it fitted the whole geometric theme perfectly.
Step 4 – Assemble the Pattern
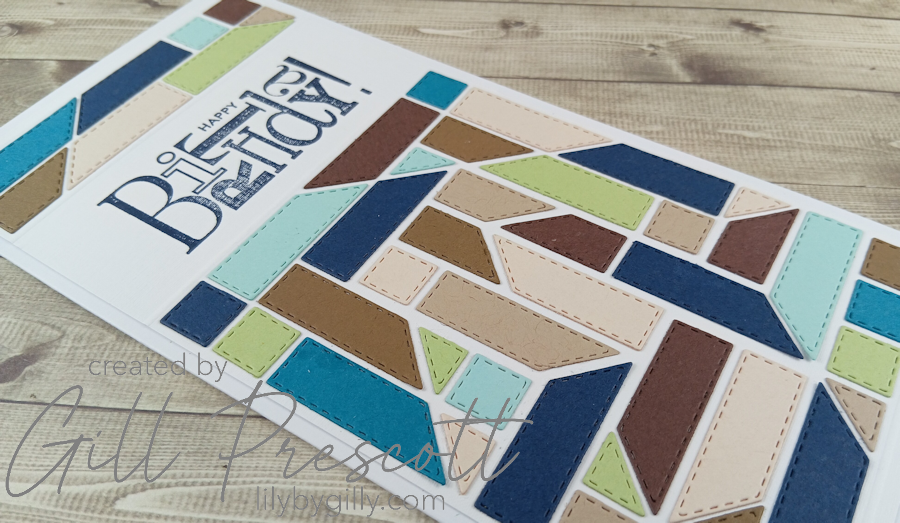
Now it was time to start putting my jigsaw puzzle back together! Using the photo on my phone as a guide, I carefully adhered each of the individual die-cut pieces onto the linen panel, positioning them both above and below the sentiment.
Because I wasn’t using the die in the way it was intended, the spaces between the pieces aren’t perfectly even — and that’s OK! In fact, I think that’s part of the charm. It’s a handmade card, after all, and I rather like the fact that the pattern isn’t completely precise. Sometimes it’s nice to let a little bit of imperfection creep into a geometric design.
Step 5 – Add Some Embossed Details
Once all the pieces were securely adhered, I wanted to add a little something to define the different sections of the design. Using my scoreboard, I added a line of embossing above and below each section of die cuts. These subtle embossed lines help to frame the geometric pieces without adding another colour or embellishment, and I love the extra bit of texture they give the finished card.
Finally, I adhered the completed linen panel to the white card base.
Final Thoughts
I really enjoyed making this card, particularly because I wasn’t restricted to using the die in the way it was originally designed. It’s always worth taking another look through those forgotten die sets in your stash. Sometimes a die you’ve bought with one particular purpose in mind can be used in a completely different way — and that’s often when the most interesting designs happen!
I also love that the colour scheme came from something completely unrelated to cardmaking. That little tin of mint tea was the perfect inspiration, and it’s a reminder that colour combinations really are everywhere if you start looking for them.
The finished card is masculine and I love all those little geometric pieces which give it plenty of interest. And while the spaces between them aren’t perfect, I’m embracing that. After all, if I wanted everything to look machine-perfect, I wouldn’t be making handmade cards! And the design, whilst I made it into a birthday card, would be perfect for so many occasions for the man in your life, from Father’s Day to thank yous.
If you enjoy playing with shapes, patterns and colour, we’d love to see what you create for this month’s Geometric challenge over at The Male Room. So have a rummage through your dies, stamps and paper stash, look at them with fresh eyes, and see if you can use something in a completely unexpected way.
Happy crafting!