
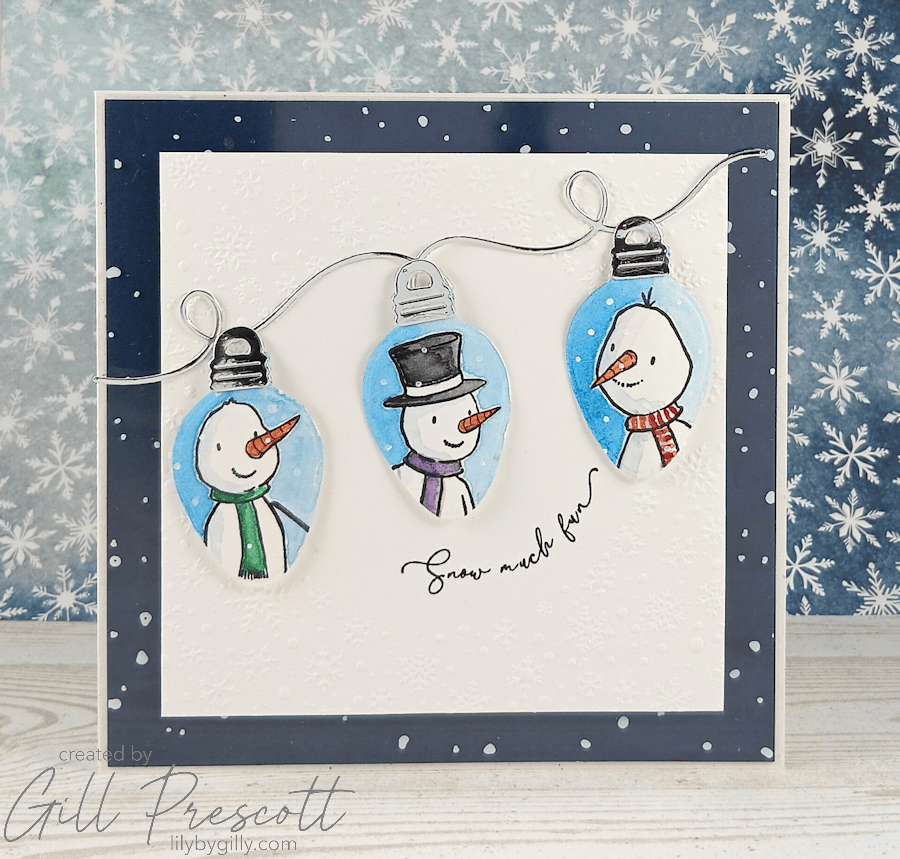
It’s time for the final 52 Christmas Card Throwdown challenge of October, and this week we’re getting creative with our dies! Our technique challenge is to create a mini scene using shaped dies. I had a good rummage through my collection of dies and considered a few different shapes before settling on something a little different. Rather than using the more obvious windows, circles or squares, I decided to use Christmas light dies to create my mini scene. Sometimes it’s fun to look at our dies and think about how we can use them in a slightly unexpected way!
For my Design Team card, I combined some watercolour snowmen with a snowy embossed background and a little silver mirror card. Here’s how I made it.
Materials Used
- Cardstock: Natural white (for the base), Night of Navy, silver mirror, watercolour paper
- Stamp sets: Snow People, Josh Griffiths Studio; Winter Wonderland Ice Skate, Chloe’s Creative Cards
- Craft Addiction UK: Magical Snowfall embossing folder, Craft Addiction UK
- Dies: Christmas lights
- Ink: Black
- Adhesive: foam tape, liquid glue, red liner tape
- Additional: Snowflake acetate by Hunkydory, Watercolour paints, bone folder
Step 1 – Create the Card Base
I started with a 6″ square natural white card base and cut a piece of Night of Navy cardstock ¼” smaller to create the matting layer.
I recently bought some snowflake acetate and thought it would work beautifully with the winter theme, so I layered this over the navy cardstock. The acetate adds a lovely frosty effect, and the dark blue underneath helps the snowflakes stand out.
I then cut a white centre panel from watercolour paper, sized smaller again, and embossed it using the Magical Snowfall embossing folder by Craft Addiction UK. I love the texture this folder creates. It gives the impression of gently falling snow and makes the perfect background for my little winter scene.
Step 2 – Stamp and Paint the Snowmen
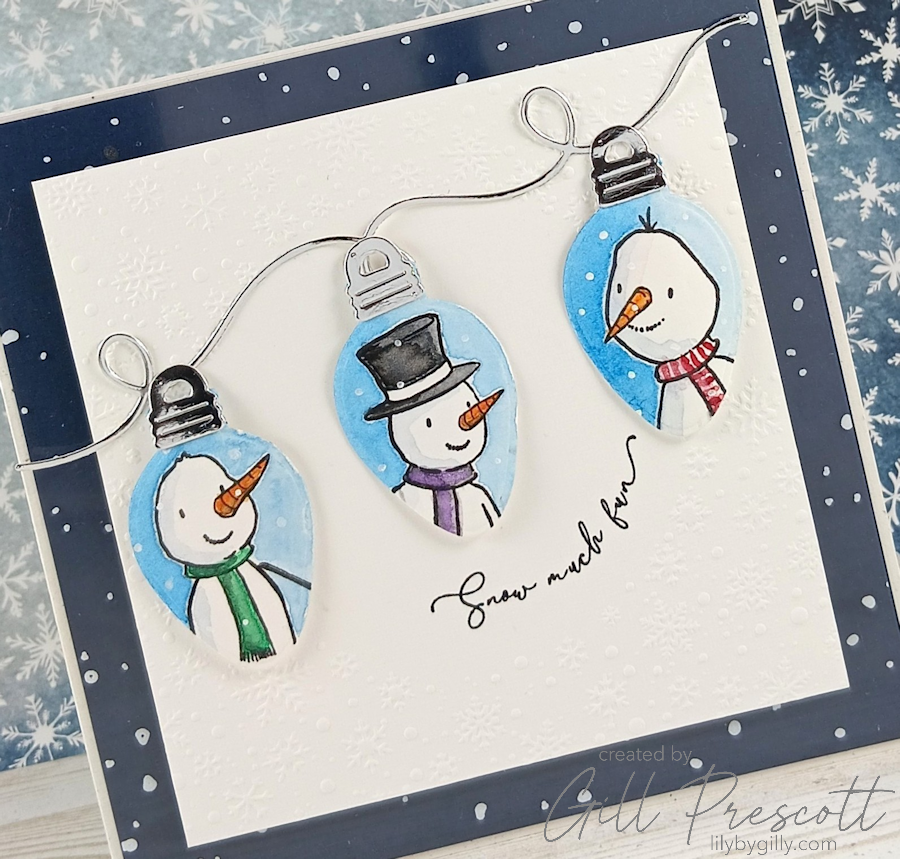
For my mini scene, I reached for the Snow People stamp set from Josh Griffiths Studio. This was one of my new purchases when I went to Josh’s watercolour workshop recently and I absolutely love it! The stamps are designed so you can stamp different bodies with different heads, and add scarves or arms or not, so each snow person looks different and takes on a different personality!
I stamped three snowmen onto watercolour paper, ready to bring them to life with my watercolour paints. I’ve been enjoying experimenting with watercolour recently, and these little characters were a lovely opportunity to have another play. I stamped the whole of the snow people onto watercolour paper and coloured each snowman in full, keeping the wintry feel of the card in mind. I knew I was going to only use a portion but it was good practice!
Once the paint was completely dry, I was ready to turn them into something a little more unusual!
Step 3 – Turn the Snowmen into Christmas Lights
This is where the fun began!
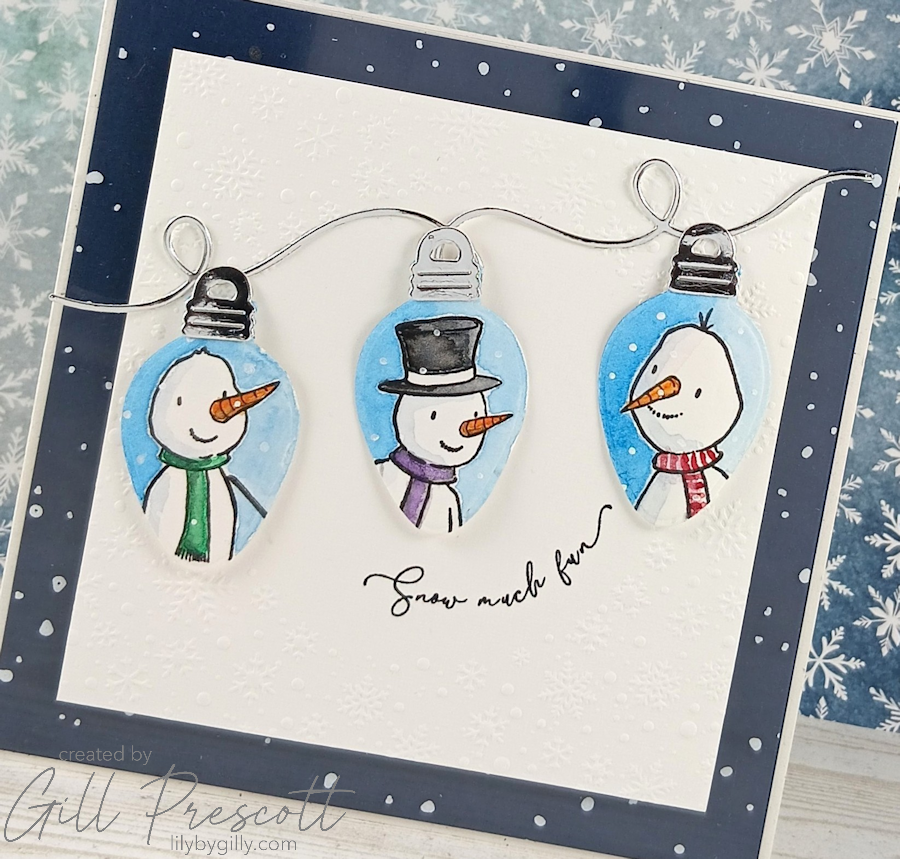
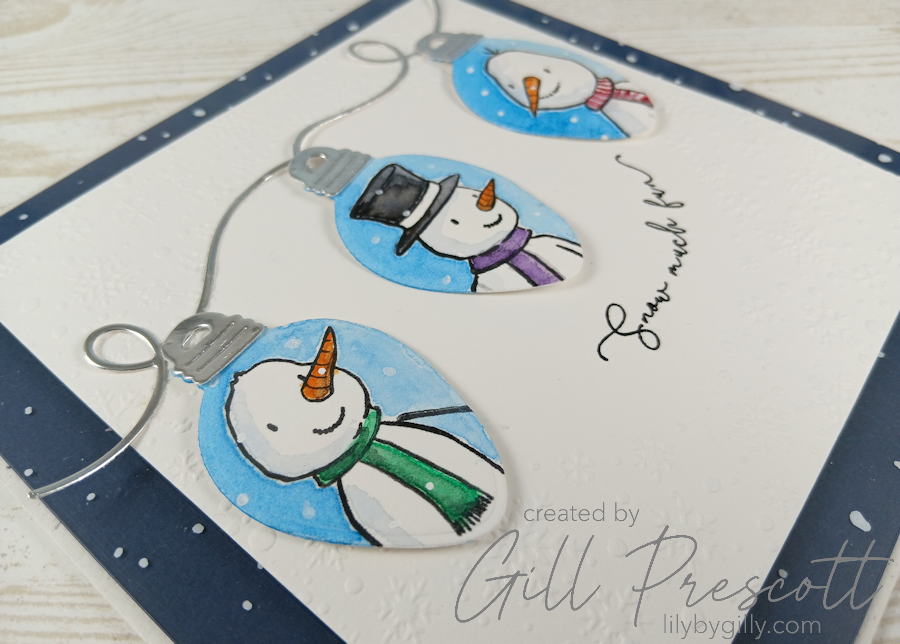
I used a Christmas light die to cut out each of my three painted snowmen. I love finding alternative ways to use dies, and I thought the shape of the Christmas lights would make a fun little frame for each character. To complete the light shapes, I die cut the tops and connecting string from silver mirror card. The shiny silver adds a lovely contrast against the white and blue of the winter scene.
It was such a simple idea, but I really enjoyed seeing how the snowmen looked once they’d been transformed into little Christmas light decorations!
Step 4 – Add the Sentiment
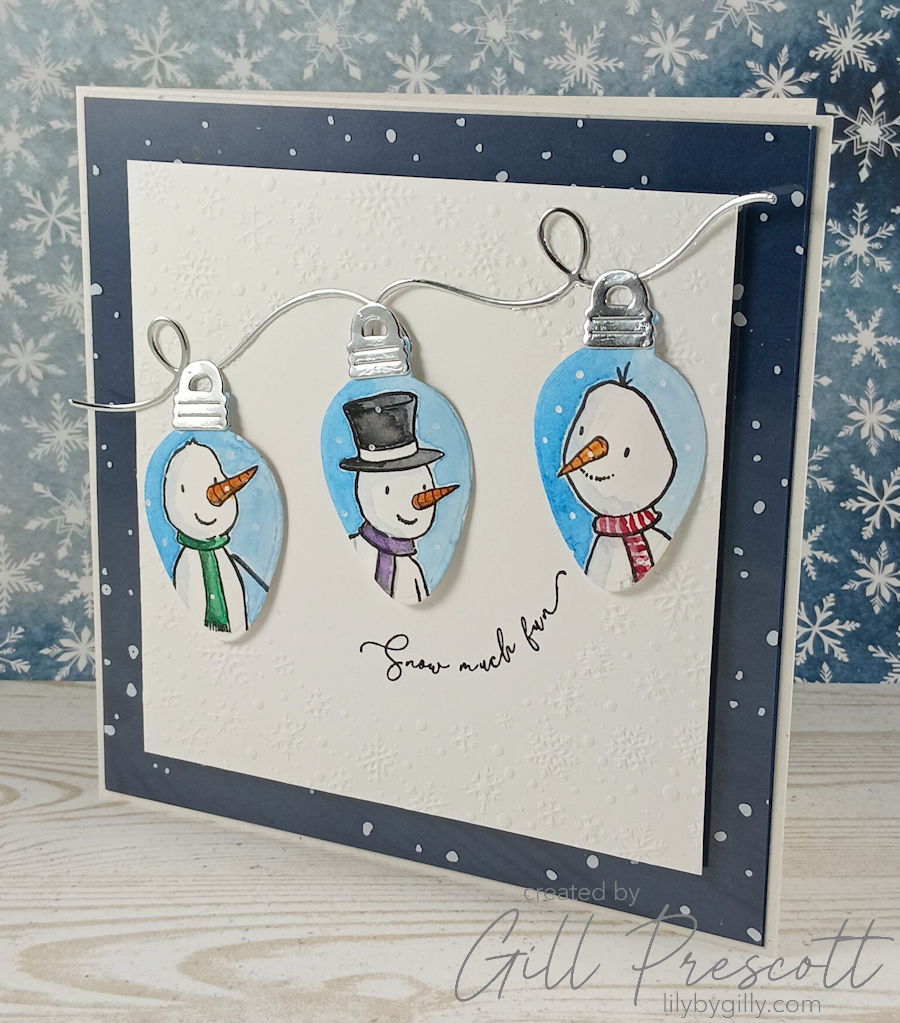
For the greeting, I used the “Snow much fun” sentiment from the Winter Wonderland Ice Skate stamp set by Chloe’s Creative Cards, stamping it in black ink directly onto the white layer.
I kept the sentiment simple so that the snowmen would remain the main focus of the card but I love the scripty font. With the embossed snowfall background, the snowflake acetate and the silver mirror card, there was already plenty of texture and detail, so a crisp black greeting was just what was needed.
Step 5 – Assemble the Mini Scene
Before adhering the Christmas light shapes to the card, I used a bone folder to gently shape each die cut, giving it a slightly rounded appearance. This little detail adds some extra dimension and makes the lights look less flat against the background.
I then arranged the three snowmen lights on the embossed white panel and adhered them using foam adhesive added just to the centre of each die cut. With the silver tops and connecting strip in place, the little snowmen looked as though they were hanging together as a festive string of Christmas lights!
Finally, I assembled the layers of the card, bringing together the navy mat, snowflake acetate and embossed watercolour panel adding foam adhesive to the watercolour embossed panel for more dimension.
Final Thoughts
I really enjoyed making this card, especially as it challenged me to look at my dies a little differently. I nearly went with one of the more obvious shapes for my mini scene, but I’m so glad I took the time to experiment with the Christmas light dies instead. The combination of the watercoloured snowmen, embossed snowfall, snowflake acetate and silver mirror card gives the finished card plenty of wintery detail, while the shaped dies create a fun focal point. It’s a great reminder that our dies don’t always have to be used in the way they were originally intended. Sometimes the most interesting ideas come from a little rummage through the stash and a willingness to experiment!
So, for this week’s 52 Christmas Card Throwdown Technique Challenge, why not take a look through your own die collection and see what you could use to create a mini scene? We’d love to see the imaginative ways you use your favourite shapes.
Happy crafting and happy Christmas card making!


