
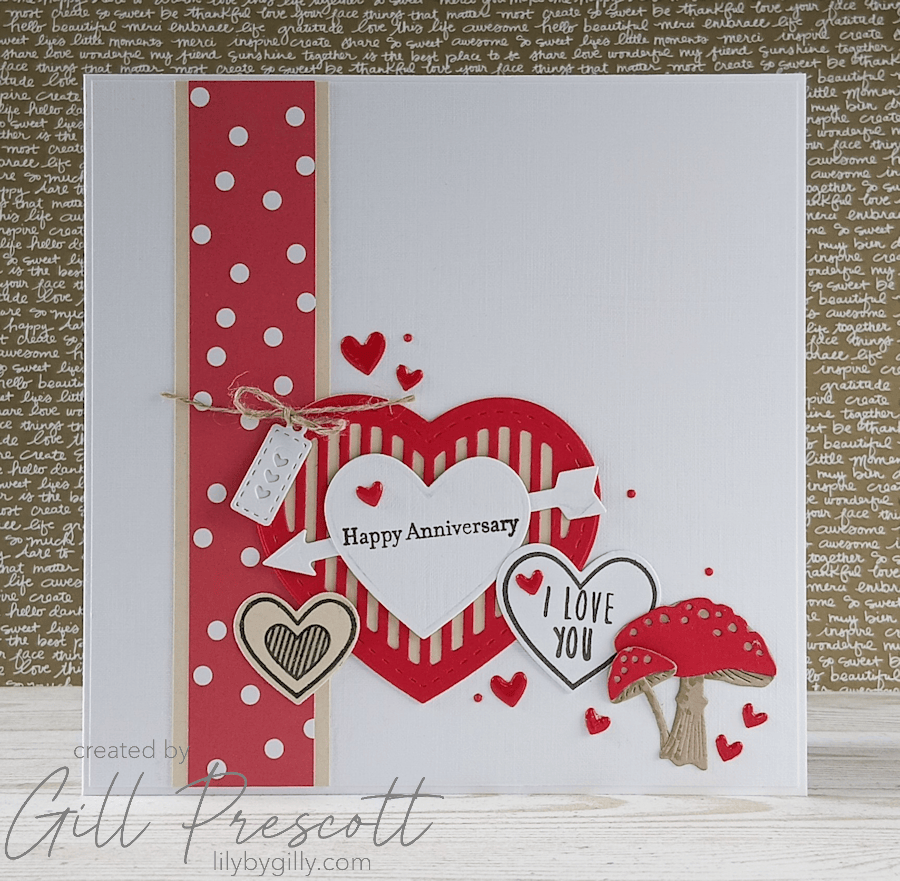
It’s time for another Design Team card for The Male Room, and this month’s challenge is “Dots and/or Stripes.”
When I saw the theme, I immediately thought about combining both elements in one design. My wedding anniversary was coming up, so I took the opportunity to make a card for my husband. Hearts were an obvious choice for the occasion, and I couldn’t resist including a few mushrooms too – they’re a bit of a running joke between us and always seem to find their way onto cards I make for him!
Here’s how I made it.
What You’ll Need
- Cardstock: white, red and beige
- DSP: Red polka dot
- Dies: slatted heart dies and tiny tags, Craft Addiction UK; hearts, Sizzix; mushrooms
- Stamps: sentiment, hearts
- Inks: real red, crumb cake, black
- Adhesive: foam adhesive, crystal effects and liquid glue.
- Additional: baker’s twine
Step 1: Create the Background
I started with a 6″ square white card base and cut a piece of white cardstock a quarter of an inch smaller to create the main panel.
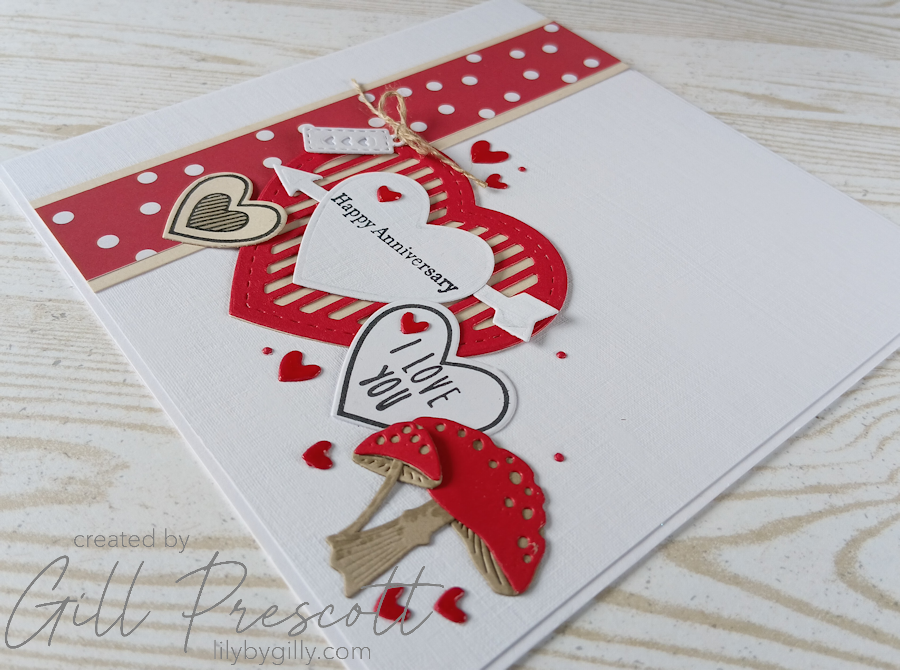
To bring in the challenge theme, I cut a strip of beige cardstock the full height of the card. A slightly narrower strip of red polka dot designer series paper was adhered down the centre before the completed panel was attached towards the left-hand side of the white background.
The combination of the bold stripes created by the layered panel and the cheerful polka dots worked perfectly for this month’s theme.
Step 2: Create the Focal Point
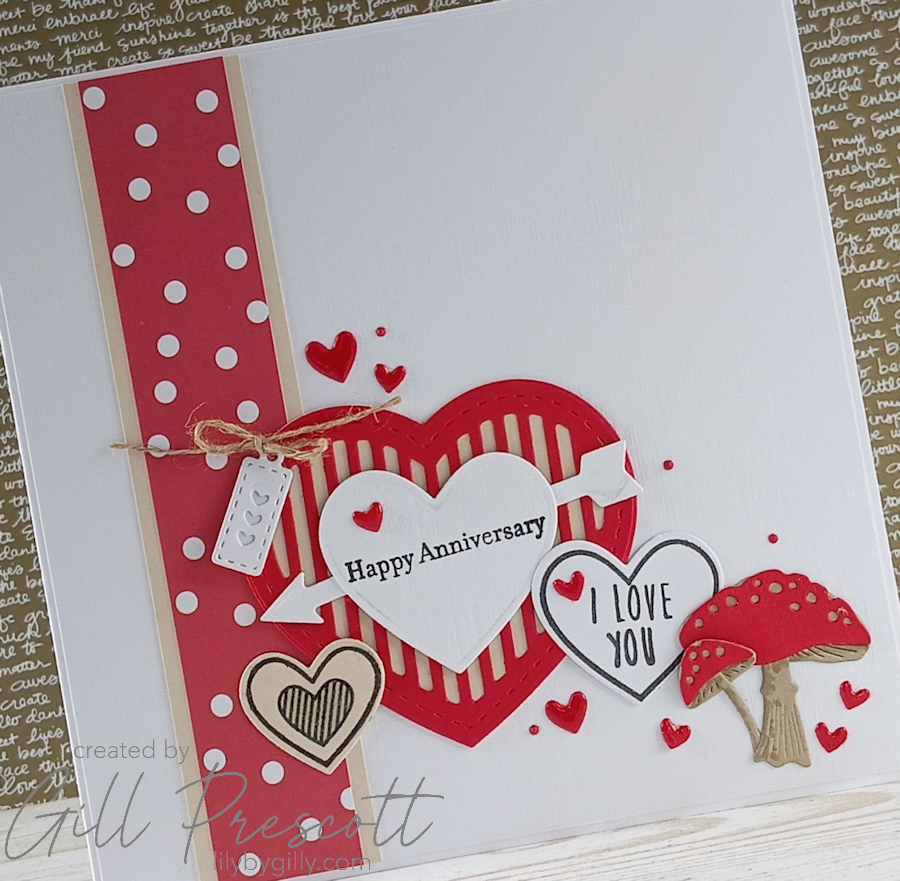
Next, I stamped and die cut a selection of hearts in different sizes from red, white and beige cardstock.
For the main focal point, I stamped “Happy Anniversary” onto a white heart before adhering it to the centre of a beautiful red slatted heart die cut. Layering the hearts added plenty of dimension while keeping the design clean and elegant.
Step 3: Add the Mushrooms
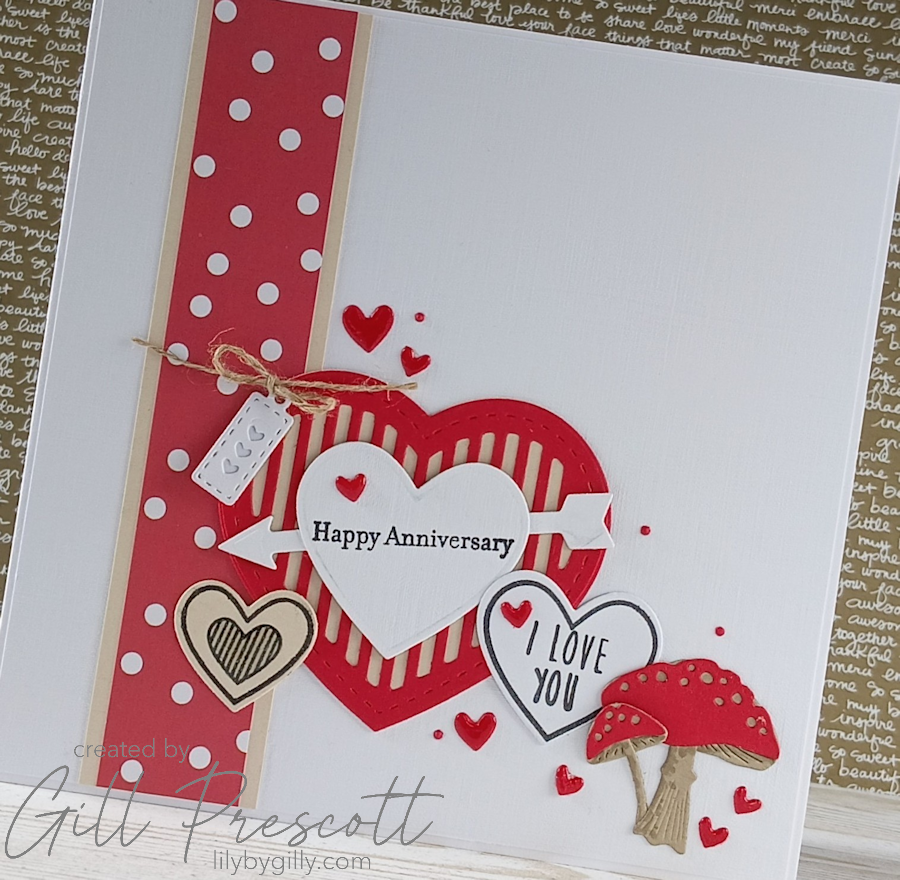
No anniversary card for my husband would be complete without a few mushrooms!
I die cut the mushrooms from red and beige cardstock before adding gentle shading with coordinating inks to give them a little more depth and definition.
To finish this little cluster, I die cut a tiny white tag and embossed it with three miniature hearts. A piece of twine threaded through the top completed the rustic look.
Step 4: Arrange the Design
Once all the elements were ready, I arranged the hearts, mushrooms and tag across the lower section of the card until I was happy with the composition.
To tie everything together, I scattered several tiny die-cut red hearts and red dots around the arrangement, adding little pops of colour across the design.
As a final finishing touch, I applied Crystal Effects to the tiny hearts, giving them a lovely glossy shine that catches the light beautifully.
Final Thoughts
I always enjoy making anniversary cards for my husband, and this one felt especially personal thanks to the little mushroom detail that means so much to us. It also proved that challenge themes don’t have to dictate the entire design—they can simply provide the starting point for something meaningful.
The layered striped panel combined with the red polka dot paper was a simple way to incorporate both elements of this month’s challenge while still creating a romantic card with lots of texture and dimension.
If you’re looking for inspiration this month, why not join us over at The Male Room and share a project featuring dots, stripes, or both? We can’t wait to see what you create!
Happy crafting!



perfect san Valentín card💐☺️ happy day
Sorry to be so late commenting. I think this is such a lovely anniversary card. I do like the cute little toadstool. Deborah, x